
The big red
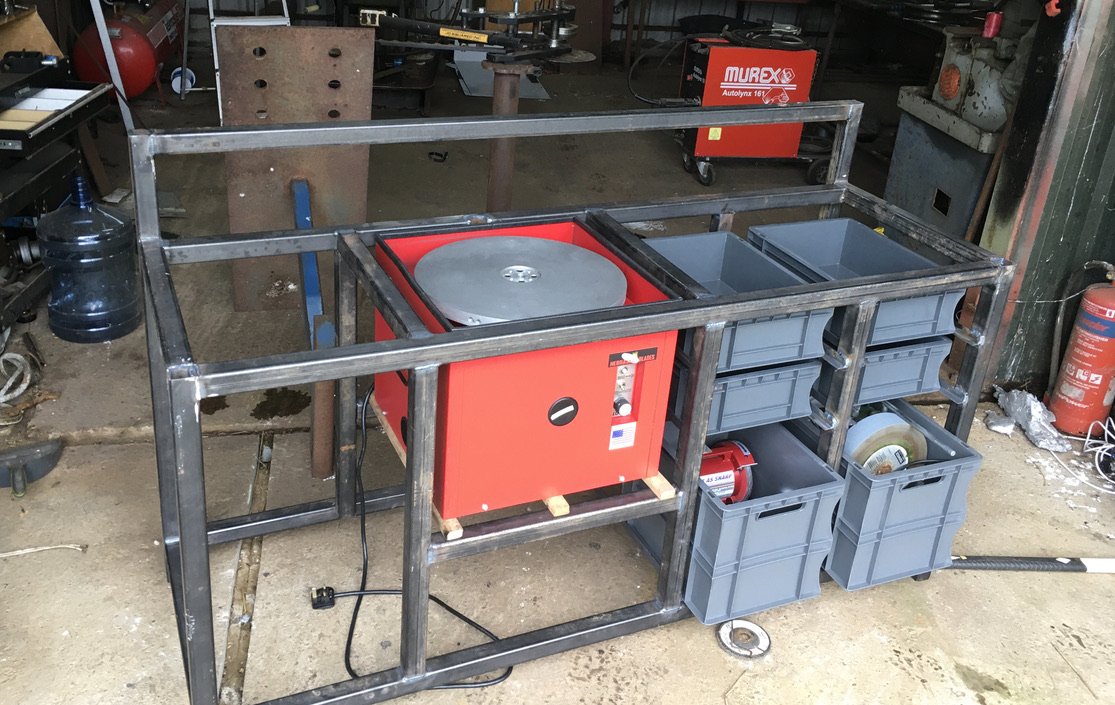
Seen here in the construction stage of our custom bench. Most of the time it is hidden
Its not very big but it is red. More officially known as the Nebraska CS-201 16” low amp machine. A evolution of the classic CS-101 which will mean absolutely nothing to you, but what you need to know is it was custom designed for mobile clipper blade sharpening, which is handy as that is what I use it for.
However we are getting ahead of ourselves.
Let’s roll back and look at your clipper blades. There is two basic parts. There is the part that stays still which is normally called the comb. There is the part which moves side to side which is called the cutter. Both parts have what can be called fingers which are like tiny scissors when they slide back and forth.
If you look at the fingers you will see there is a very shiny part (unless you have left them uncleaned in the tack room for 12 months). To sharpen a clipper this is the area you remove to make the blades thinner. This exposes fresh and sharp cutting edges.
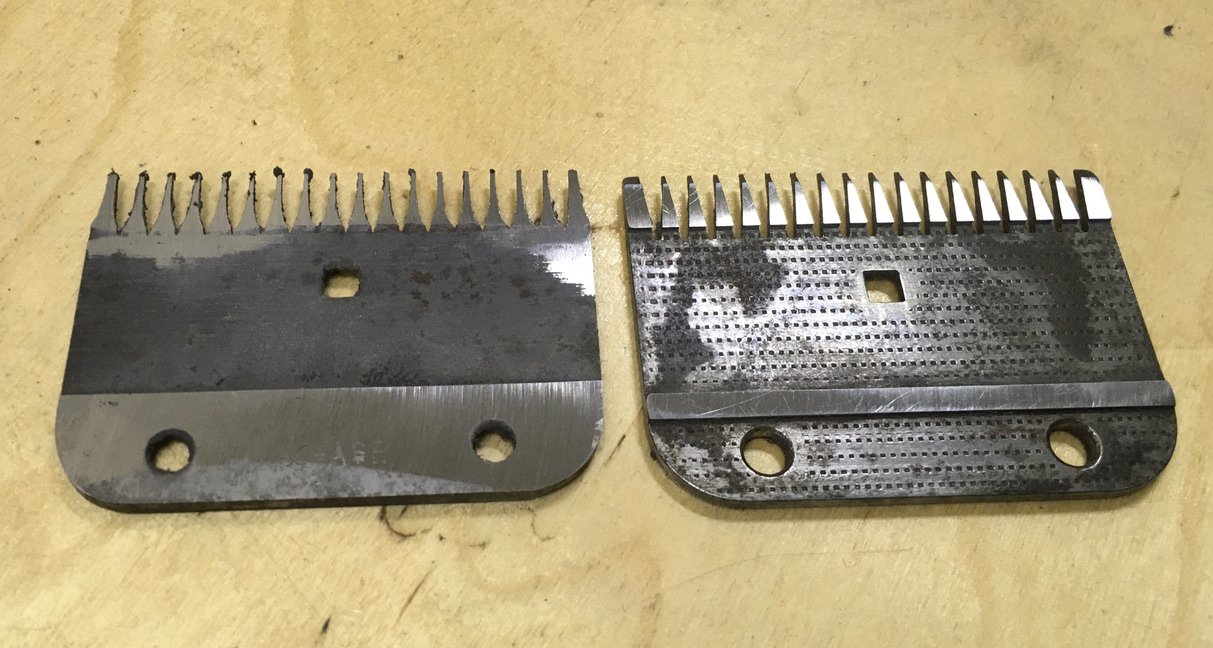
Two blades in this picture.
The one on the right shows two raised areas. One at the back which is a straight line. At front the fingers/teeth also have a raised area. Both of these areas have been recently sharped so you can see the shiny part.
The blade to the left is end of life as both of these raised parts have vanished and you can see the shiny part is coming down into the area which is a bit dull.
There is 3 basic ways to remove this metal that you should consider.
Oil Stone
The first method is simply using an oil stone. This works and it needs very little investment to get going. It however does take alot of effort and some skill. You end up with a very fine finish. You rub the cutting faces back and forth on the oil stone to slowly remove metal. In the modern world you can also use a DMT plate which isn’t made of stone and doesn’t use oil. I have one in my kit which is used for some things like mincing machine cutters.
Lapping
The next method is lapping machine. This is a way of removing a very small amount of metal and it will also give an excellent surface finish. Basically it is a slow spinning cast iron disc which has a diamond slurry on it which removes a tiny amount of material. The downside of this is it is very slow so unless you have a couple of machines the workrate is also slow. Another downside of this slow process is those that leave your blades in “less than ideal storage conditions” you end up with rust and pitting on the cutting faces which take an abject age to remove.
The machines aren’t overly suited to mobile life either up and down bumpy farm tracks in aberdeenshire. I would not rule one out in the future of barras blades to keep at base.
Grinding
For grinding you have an aluminium wheel which spins faster than a lapping wheel. This wheel is then coated in something abrasive which traditionally is lard oil and a fine aluminium oxide grit. In aberdeenshire in winter the lard oil is more lard than oil so I use something else its also pretty disgusting if it leaks. What is used to hold the grit is a matter of debate and experimentation from different sharpeners.
The blades are then held on this disc manually and moved back and forth over the disc to get an even grind.
The advantages of this method is it is quick as alot of material is removed so a blade can be sharpened in a few minutes instead of 20 minutes for lapping or an hour for the oil stone.
The downside is it takes more skill and training which I have done. The rapid material removal means that you don’t get as much life out of a blade. However if the blades have been stored poorly then you need to remove this corrosion.
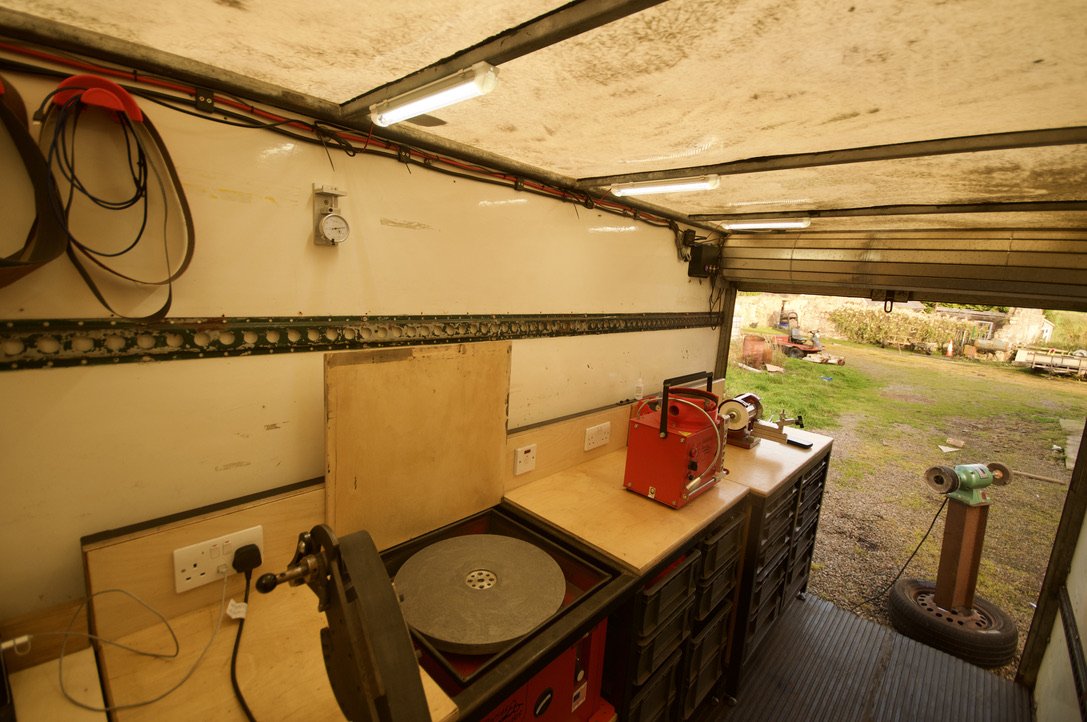
A more recent picture showing the big red with the hatch lifted. Normally it is hiding under the workbench
Flat or hollow grind
With your scissors you will know that if you put pressure on the handles to push the blades together they will cut better. It is the same with clipper blades. Just here they are pushed together by a spring. This spring pushes on the centre of the blade. Now imagine your blade is perfectly flat and you press in the middle you would correctly assume that is will bend by a tiny amount and have more tension in the middle than at the edges. If the blade was more pringle shaped and you pushed on the centre and it was pringle you found down the back of the sofa so a bit soggy then you would see that it would flatten out and have even pressure along the edge.
With an good oil stone you aren’t going to get a pringle shape you will get a perfectly flat surface. Which will work but as we have seen above it won’t work for long or very well.
This is why purpose made grinding or lapping machines are setup to create a pringle shape. Or to give it the correct name a hollow grind.

How it works
The big spinning plate looks flat but it isn’t It is actually a very shallow cone. The picture here is a much steeper cone.
There is a slice out of the cone in this picture and you can see that it gives a curved line. Just with plate on the big red it is about 1mm tall so it is a much shallower curve.
This is what produces the hollow grind

The evidence
Our end of life blade from above but zoomed right into the bottom of the blade.
See the curved line at the edge of the shiny area?
That is evidence of the hollow grind
The depth of the hollow grind is a few microns so you won’t be able to feel it and you’ll have difficulty measuring it unless you have access to a faro arm. There is a way of checking the grind which is to rub a freshly ground blade on a very flat piece of steel. This burnishes the areas hitting the flat steel and from this pattern you can adjust what you are doing. It is difficult to see and it is almost impossible to photograph.
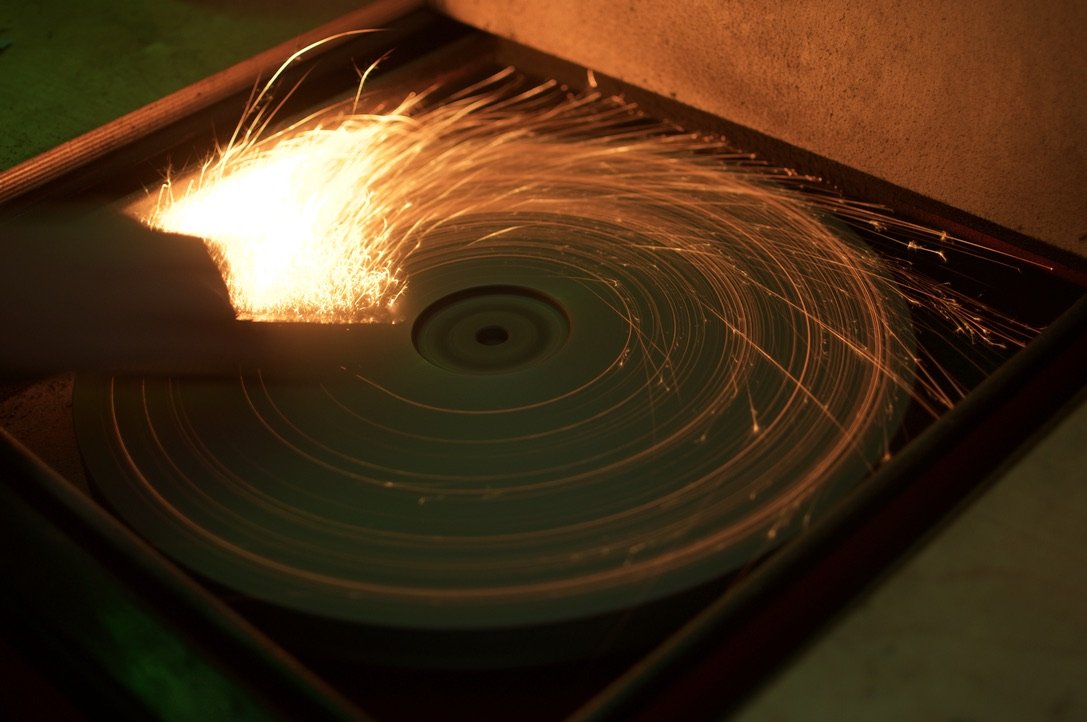
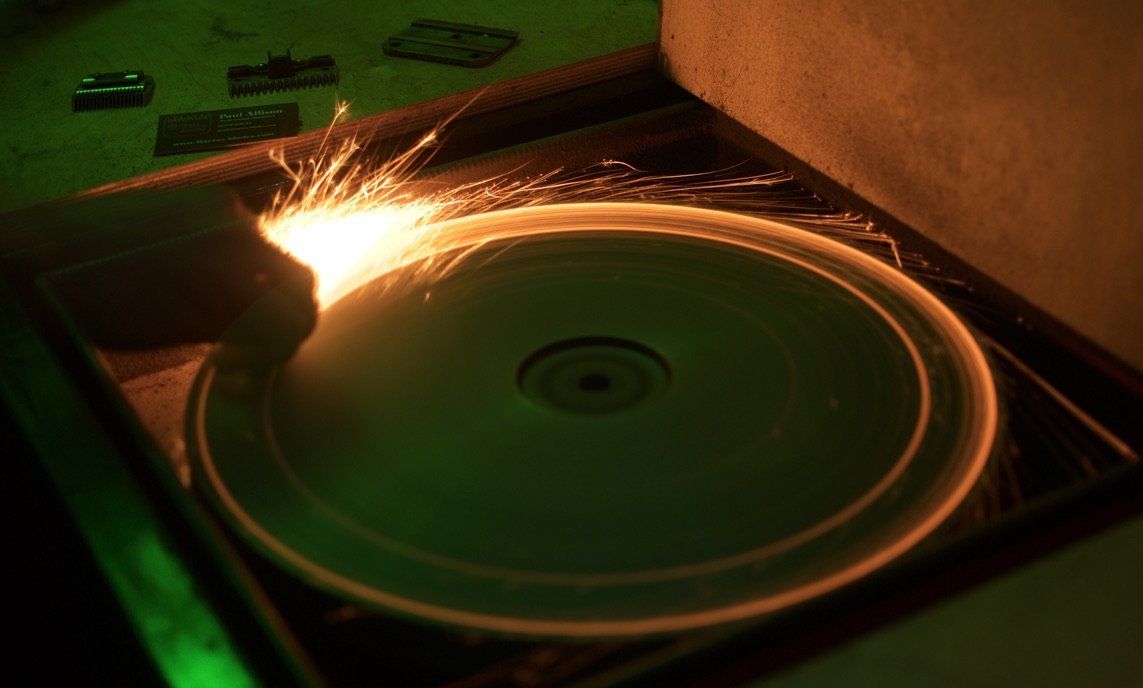
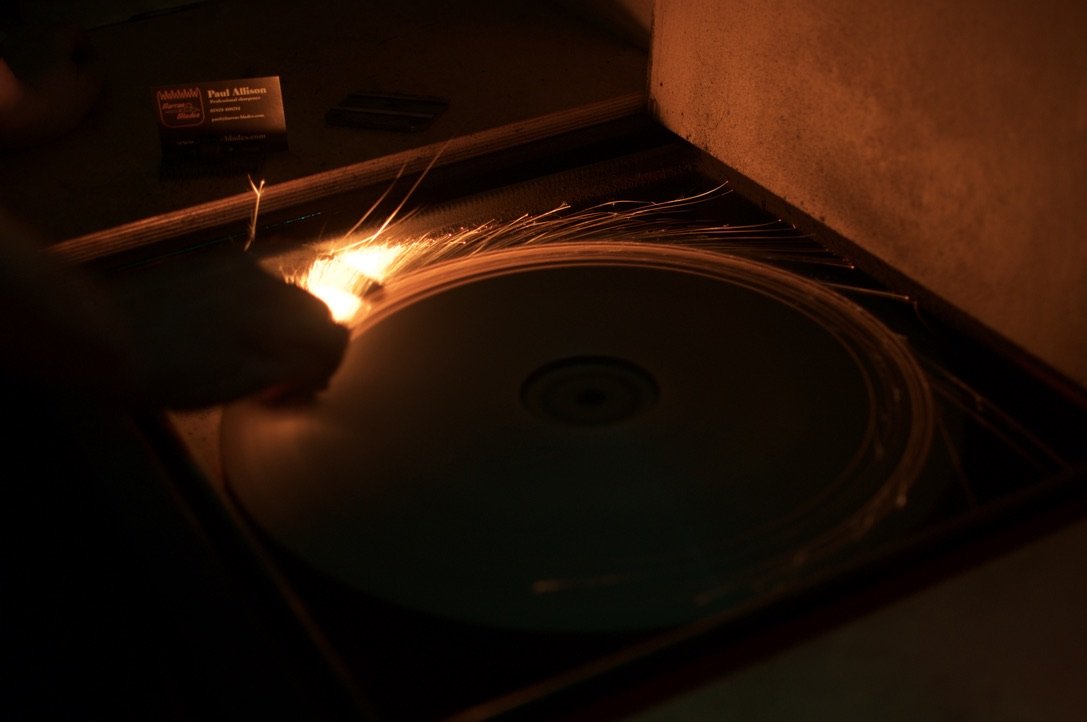
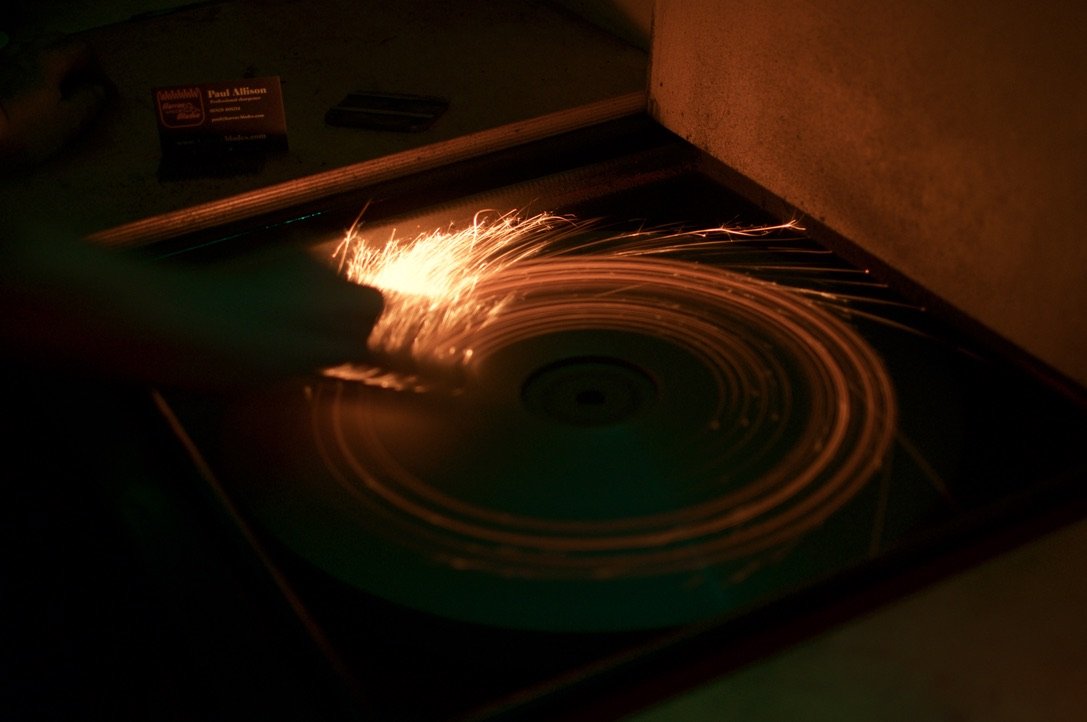
Another part of the process is judging how well the grit has stuck to the plate and how much is left by the spark pattern being created by the clipper blade.
This is another thing which is difficult to capture on camera
BUT
If you take the pictures in very low light with a long exposure you get the background and the pictures below