
Groomers blade push
The background
As a sharpener I deal with groomers regularly and one of them had a re-occurring problem where her blades where coming apart. As someone who is newish to sharpening I was concerned it was something I was doing so a further investigation was needed.
So popped up to her salon where I met one of her clients and after establishing I didn’t in fact have any dog treats. We discussed how her blades where coming apart.
For cleaning them she’s pushing the cutter halfway across the blade so the back of the cutter can be cleaned as well cleaning the comb under the cutter. As the cutters suffer from a great deal of stiction they need a lot of force to get them moving which makes it quite easy to push them straight out the side of the tensioner. There is also the issue that can be difficult to get a decent grip on the cutter.
I left there with a few ideas on how to achieve this.
One idea being a carrier that clipped onto the blade that would limit the distance the cutter could move. This wouldn’t really solve the issue of gripping the cutter. So this would need a push stick.
If I am making a push stick then why not design the push stick so that I can only push so far.
I came up with a reasonably simple design which is easily printed on a 3D printer. As i have just started up a 3D printing arm of barras blades to try and pay for my hobby Printed out a prototype which I discovered wasn’t screamingly obvious on how to use so I made minor alteration. I then made two more one of which was given to the original groomer. The other I thought I would give to another groomer to see if it was of interest. I posted it in a groomers group on Facebook and I received much more interest than I expected.
Time to order some more 3D printer filament.

The design
Skip this if you aren’t a nerd, read on if you are.
So why have I put the blade on the edge and not put it centrally? If it was mounted centrally then it could be used either way up.
3D printing is a process where layers are built up one on top of one another. So to print something you have to have a support underneath the layer as you can’t print in mid air. You can use support material but this normally gives a terrible finish so i try to avoid it.
This makes it alot easier to print the blade on the print surface.
I could get round this by printing the blade push standing on its end and then i could easily print the blade in the middle.
But there is another factor is each layer is quite strong but the amount of strength that joins each layer together is significantly less. It is somewhat like wood as in there is a strong direction and a weak direction. This has to be accounted for when designing something.
If you look to the picture to the right you will see a screen shot from the 3D printing slicing software which shows the layers. The one at the back is printed standing up. If i printed the blade push standing up then it would be very weak and would snap off with clumsy use.
There is a 3rd minor factor related to strength. So while i could use support material to lift the blade up to the centre of the handle it would move it away from the bottom layers. Because most 3D prints are hollow with a light infill pattern inside this would mean the blade would end up hanging off this infill material. There is a few tricks that can be done with modifiers to increase the infill at one end up still ultimately a central mounted blade would still be hanging off infill instead of the stronger bottom layer.
The next question is material choice
The vast majority of 3D printing is done with PLA. It is easy to print, gives a good finish and comes in a squillion different colours. It is also one of the strongest materials in tensile loading. The downside in this application is it is quite brittle and it isn’t the best at handling heat. The brittle being the killer.
The best material i have on hand for printing this would be Polycarbonate which is the same stuff bullet proof windows are made of it is a very impressive plastic. However its a sod to print unless you go for the carbon fibre filled version which has a few downsides. It’s hard to get and it’s expensive. Even worse for groomers the carbonfibre filled version comes in grey, grey or grey. groomers don’t like grey. Two of the initial prototypes where printed in this material. So if you have a grey one in your hand. It was printed from some quite expensive material.
This brings me to my material of choice which is PETG which is a glycol modified version of PET which is the stuff coke bottles are made of. I could go into the chemistry but it would be deeply dull and I only have a brief grasp of chemistry.
PETG has advantages over PLA in it is more ductile (bendy) as well as a better high temperature performance so it will survive a brief encounter with a hairdryer or hot water. It is reasonably easy to print and for groomers it comes in a wide range of colours.
I buy mine from Prusa and the range of colours is here If you see a colour there you really like then drop me a line and we can work something out
How to use
I’m going to assume you already have some dirty clipper blades which is the most vital part of the operation.
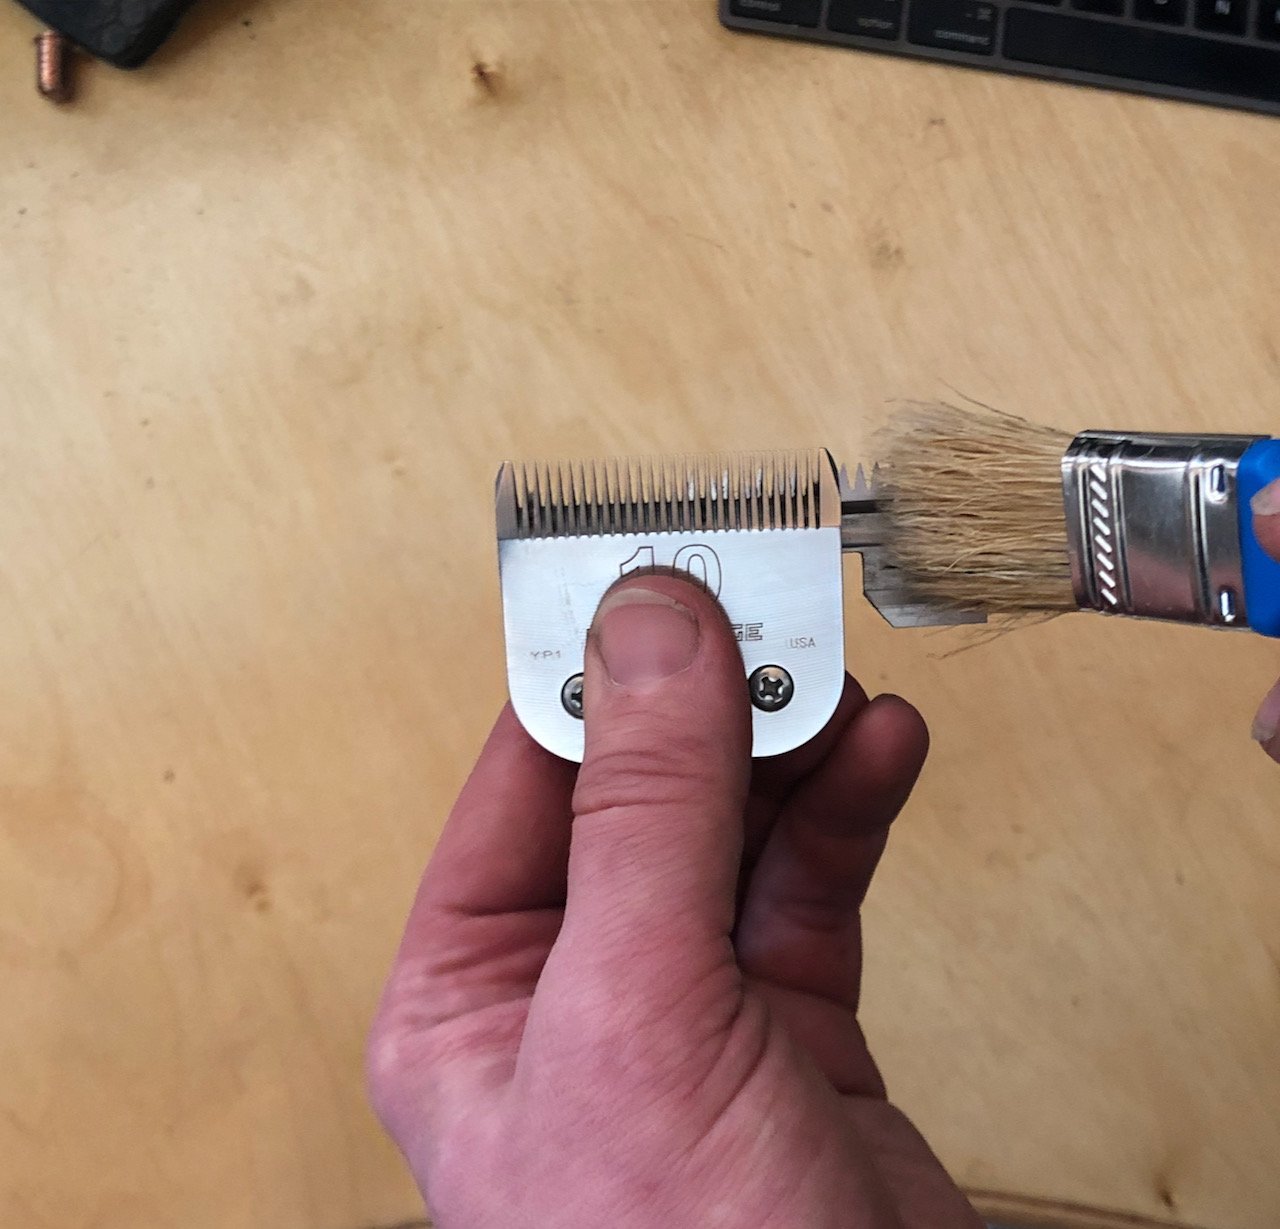
What you will also need is at least a brush for cleaning. I use a small toothbrush sized brass brush for most of the cleaning I do while sharpening. Link here. Other options are a paint brush, an actual toothbrush or even a mini air compressor.
After cleaning you are going to want to re-oil the blade. If you haven’t got one then you want a “needle point oil dispenser” These come in many sizes and flavours but you probably want at most a 50ml one with 30ml being a nicer size to use

The back of the blade push comes with a handy hint which if you follow this it should make everything nice and easy
Step 1
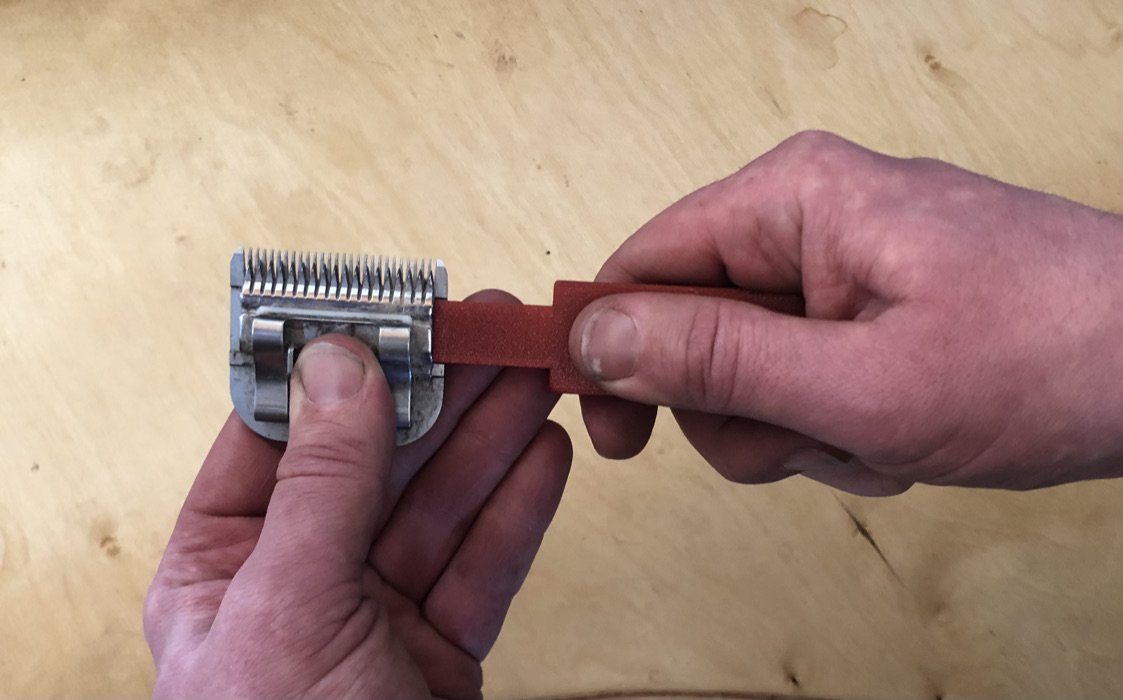
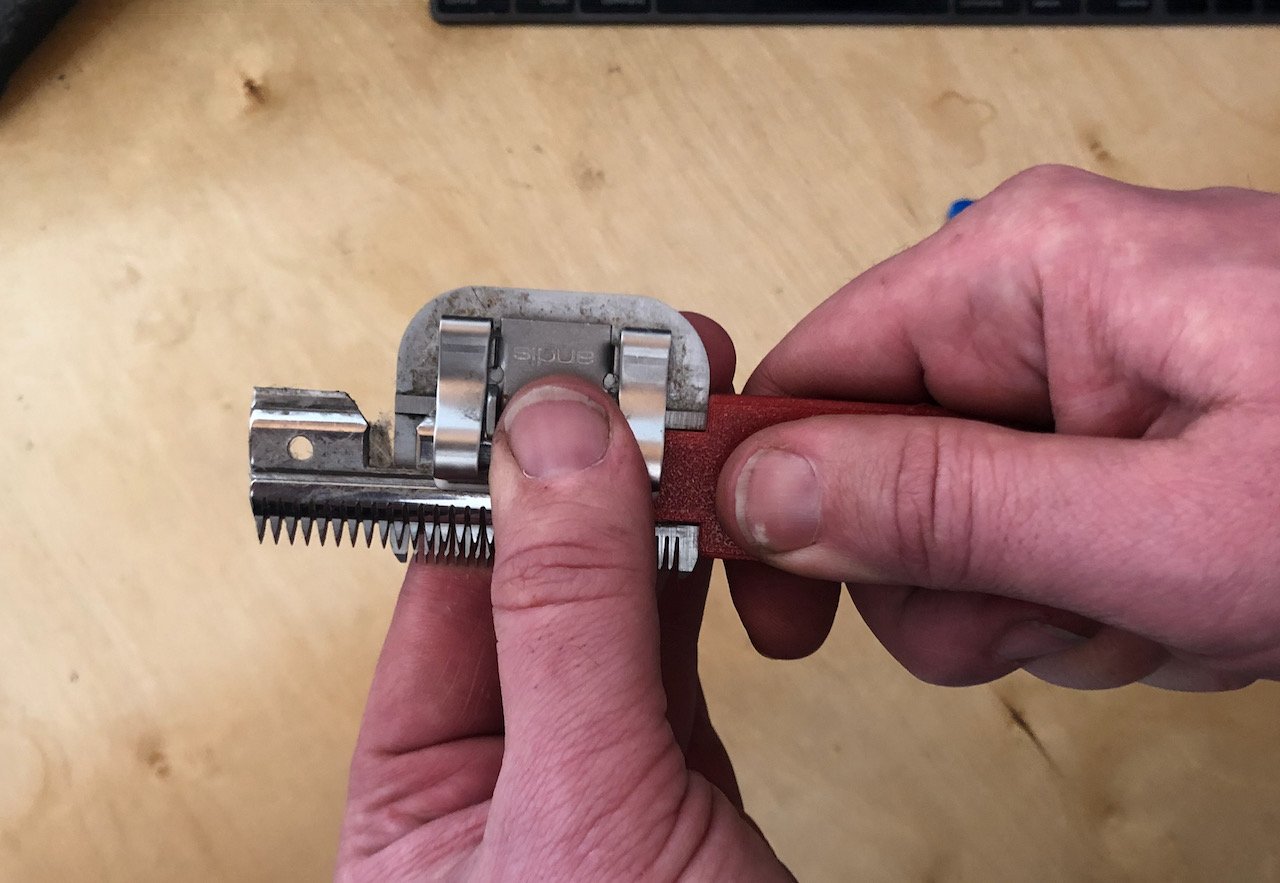
Line up the blade of the blade push with the cutter on your blade. Keep it between the two shiny bits (rails and teeth)
And with your other hand hold the blade by the blade socket.
You can hold it the other way around for the left handed out there

Step 2
Push the cutter across until the blade push comes against the side of the comb.
This should allow you enough room to get to the back of the cutter and the comb.

Step 3
Brush away the hair or whatever is hiding under there
Step 4
Flip the blade over and clean under the cutter. This is a good time to oil the blade with a small drop of oil on the shiny bits

Step 5
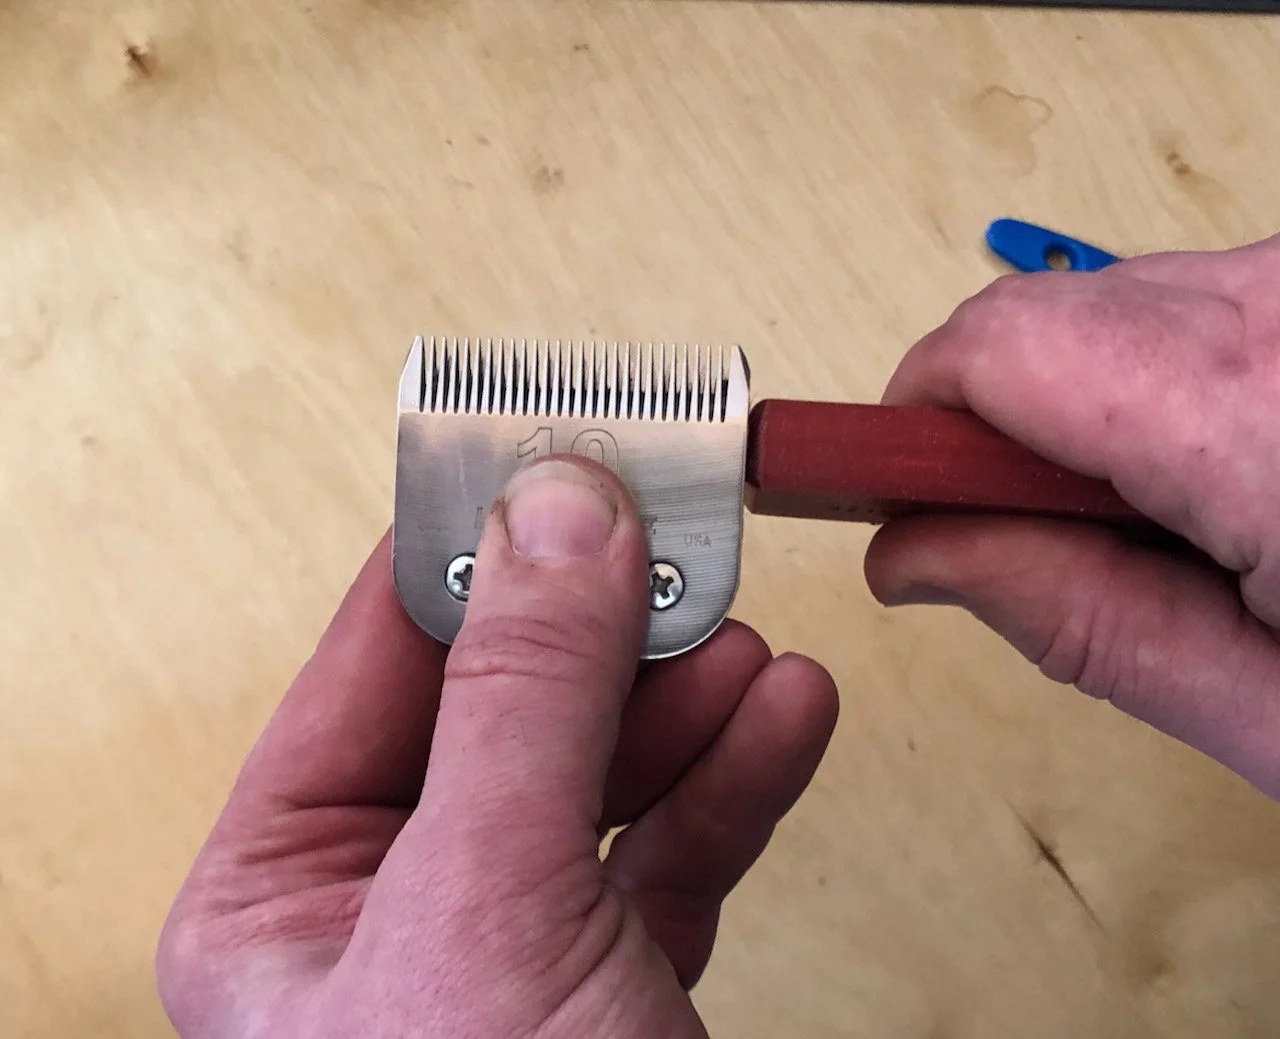
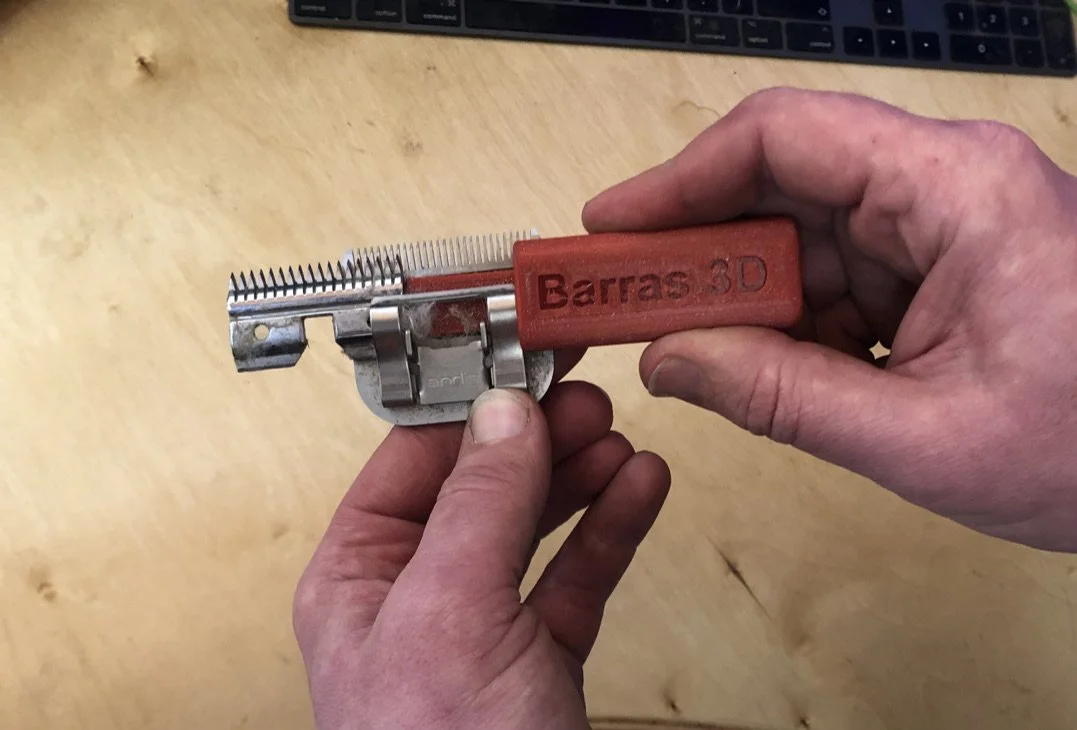
Turn the blade push around and using the back of it against the cutter
Step 6
Push the cutter home using the back of the blade push
Step 7
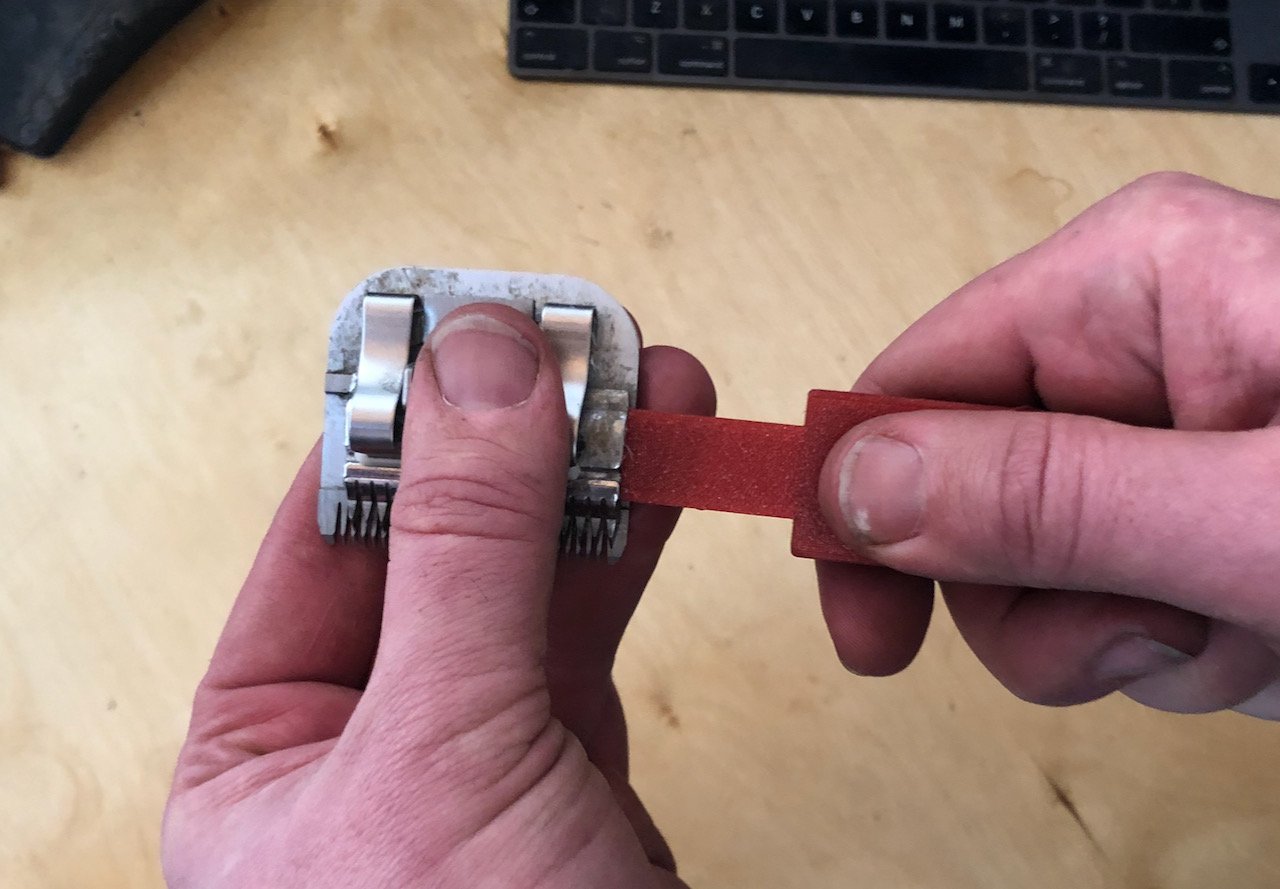
Now flip your clipper blade with the teeth towards you and hold it by the back. Then as per step 1 line the end of the blade with the cutter between the two shiny rails.
Step 8
Push the blade across until the blade push hits the side of the comb.
Then clean and lube as above
WHOOPS i held my blade push the wrong way up!!!!!
Okay you have ignored the thumb here instruction and you have used your blade push the wrong way up.
It shouldn’t be a major problem as the length of the blade push means that it shouldn’t push the cutter out from under the tension bar. The cutter won’t be quite as secure as using it the intended way up but providing you take a wee bit more care it shouldn’t cause you an issue.
Just be careful pushing the cutter back under the tensioner.
If you like the blade push then it can be purchased from my online shop HERE
The future
So i’ve got them on sale and hopefully the orders are coming in nicely.
Where do i go from here?
If they prove to be popular enough then i may look at farming out the production to an injection moulding company but that will be an investment of about £5000 for the tooling and prototype but that is a good way into the future.
If you follow the blog or the mailing list you can see where this goes.
If you want to distribute them then drop me a line via the contact page and we can discuss this