
Clipper blade end of life
As a sharpener I often have to say that a groomers clipper blade is end of life. A sharpener can replace most bits and will have a pile of bits taken from scrapped blades that will let us get a blade working again. We can replace the socket, the tension spring, the blade guide, the screws and even the cutter. What we can’t replace is the comb.
There is two common ways the comb will need to be binned.
The first way is if you drop a blade and you break a tooth. When the blade is assembled you might not even notice this is it is minor but after sharpening it becomes very obvious.

Broken tooth
If you look along the tips of the teeth on this comb you can see that one is shorter than the others.
In this picture i have highlighted it with a black dot.
This particular blade got rebuilt and was returned as an emergency use as it still worked but if the damage was any worse then it would of carried the risk of hurting the dog as the cutter would be exposed.
If you have been paying attention to the Big red page up in the tech section you will know that a clipper blade is sharpened by making the blade thinner not by sharpening in between the teeth. As a sharpener I aim to take two thou off the blade. If you are either and American or someone who works in oil and gas in a machine shop that will make perfect sense. To normal people that will just be technobabble which will make as much sense as the explanation and function of the turboencabulator. So two thou refers to two thousands of an inch. This in metric is 0.05mm which is about the thickness of a sheet of thin paper.
To measure this I use what I call a clock which brings us back to technobabble. Its proper name is a dial test indicator which shows how far a rod has moved.

Dial test indicator
The central rod in this has a ball bearing on the end and it moves up and down.
That movement is then shown on the dial. This doesn’t measure anything it merely shows a difference
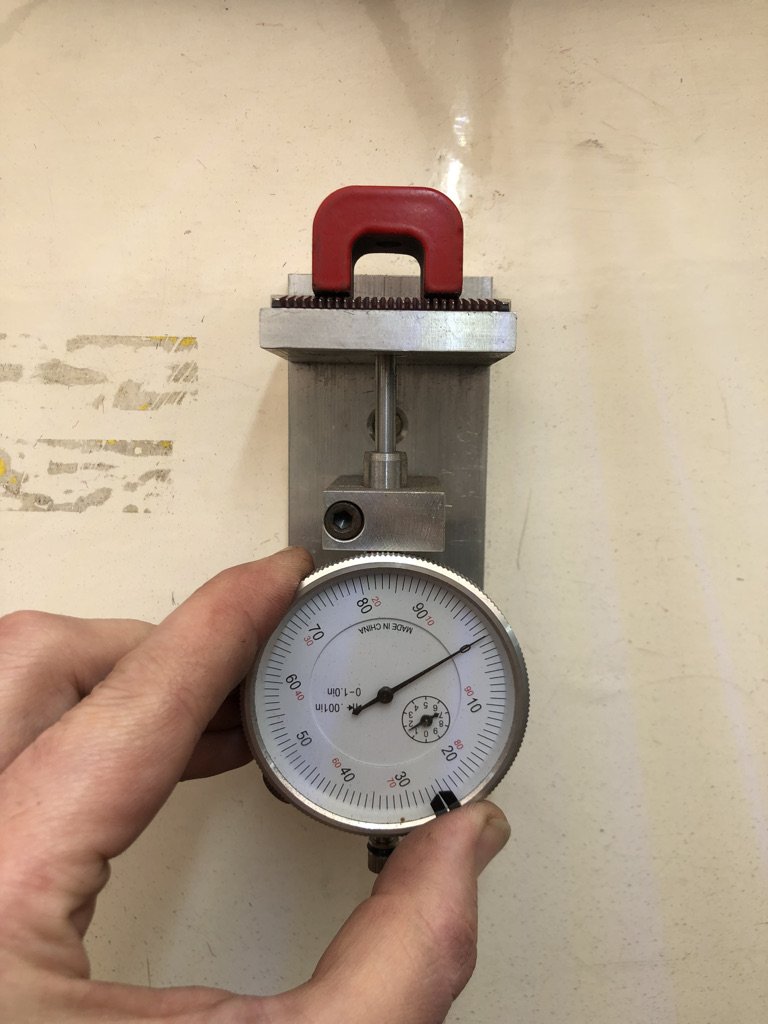
The comb is placed onto of this rig and the outside of the gauge is turned around to zero it. Then after sharpening you can see how much material has been removed.
I am aiming for 2thou of material removal which is measured on the big dial.
That was a brief detour down a side road of the world of sharpening and how stuff is measured. The real sciences behind this is called metrology. As an engineering nerd i find this utterly fascinating as it is what the modern world is built upon.
If you want a bigger detour then head here to youtube to the this playlist from machine thinking who is a small youtube channel who has some excellent video including this one on 50,000 ton presses
The following pictures are of two clipper blade combs which i have coloured in with a black sharpie to make the areas sharpened stand out. if it is black then it hasn’t been on the wheel. If it is shiny then material has been removed
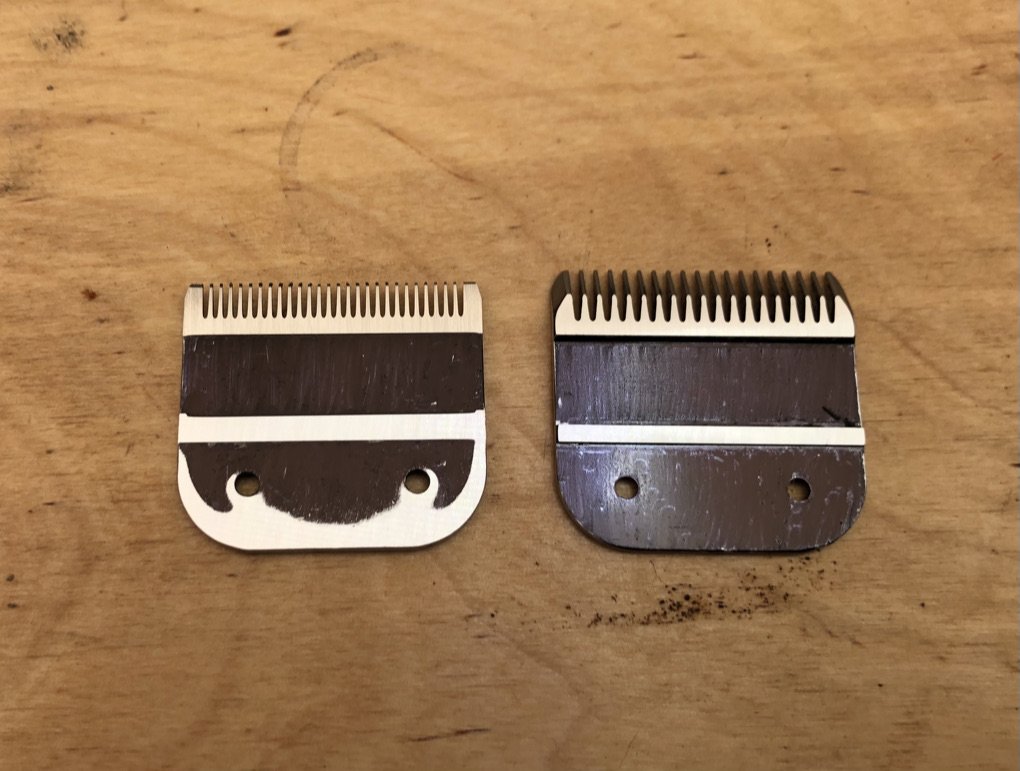
These two blades are of a slightly different type but they were what I had at hand. The left hand blade you can see after being put on the grinding wheel the very back of the comb is rubbing. This can be caused by incorrect sharpening but normally it is a sign the blade is near the end of its days. When you have a blade assembled this is very easy to spot as it will be shiny. The normal finish on a blade is a satin finish either from forging or casting. There is some blades which have a nitride finish which is claimed to increase hardness this can be blade or gold, normally black. Either way if it is shiny at the back of blade its close to the scrap bin.
The blade on the right you can see there is a thin shiny line about the middle of the blade. This is known as the rear rail. This supports the back of the cutter. This is one of the spots you should be oiling.
At the front there is the teeth with a small flat section below it. This is where the cutter slides back and forth and where the actual cutting process takes place.

A newish blade
On this blade you can see the rear rail is well above the main surface of the comb. you can also see the there is a decent step on the cutting face.
These aren’t so easy to see when the blade is assembled but you can see them
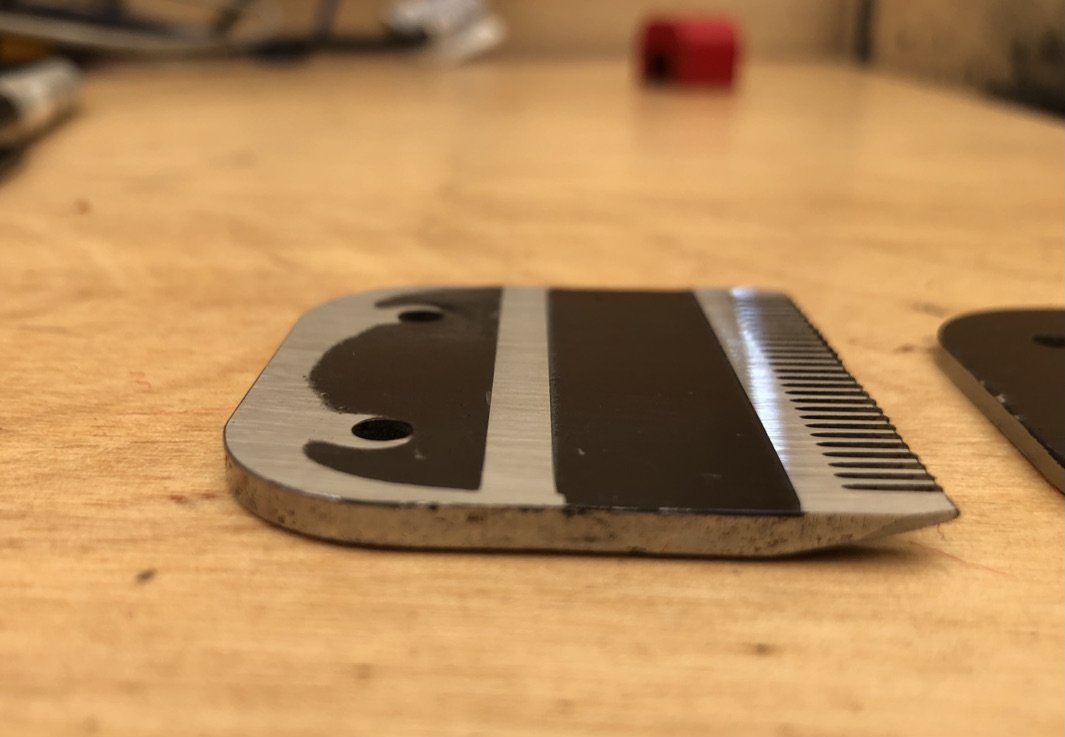
A scrap blade
Looking at the rear rail you can see it has almost completely disappeared and it is level with the edges of the back of the blade.
Looking at the cutting surface you can see it is barely above the surface of the comb.
This blade might work but more than likely it is scrap.
later in the day i came across another pair of blades which are a good example. Both are Whal competition blades so they should look the same

Good blade
This blade has had quite alot of sharpening and is close to end of life but i think you will get one or two more sharpenings out of it.
The rear rail is wider on these blades but you can see it is standing proud of the comb.
The cutting surface on these blades is unusual as it has V notches. This will probably cut down on friction and will also make for better clearing of hair parts. My inner nerd does question if this will help with hydrodynamic lubrication.

Scrap blade
On this blade I have attacked it with the marker pen to make things stand out. I will be honest in saying that what scrapped this initially was a very slight washout on the left hand of the cutting face but to make a point i took another few thou off to show a completely dead blade.
The V shapes have completely disappeared on the cutting face and the back of the cutting face is level with the face of the comb.
There is no touching at the back of the comb as these blades have two small square posts which touch the grinding plate
So when your sharpener sayes that a blade is scrap this is more than likely what they have seen. This can’t be economically fixed so it is end of days for the blade. Do however let them take the blade away as it will be stripped down for parts. The screws from one of these dead blades where used to repair a stripped screw on another groomers blade

And finally
Zooming right into this picture you can see the burrs from sharpening. these are visible in this case as I took alot of metal off this blade. Normally these can’t be seen but they are removed after sharpening with a brass or nylon brush