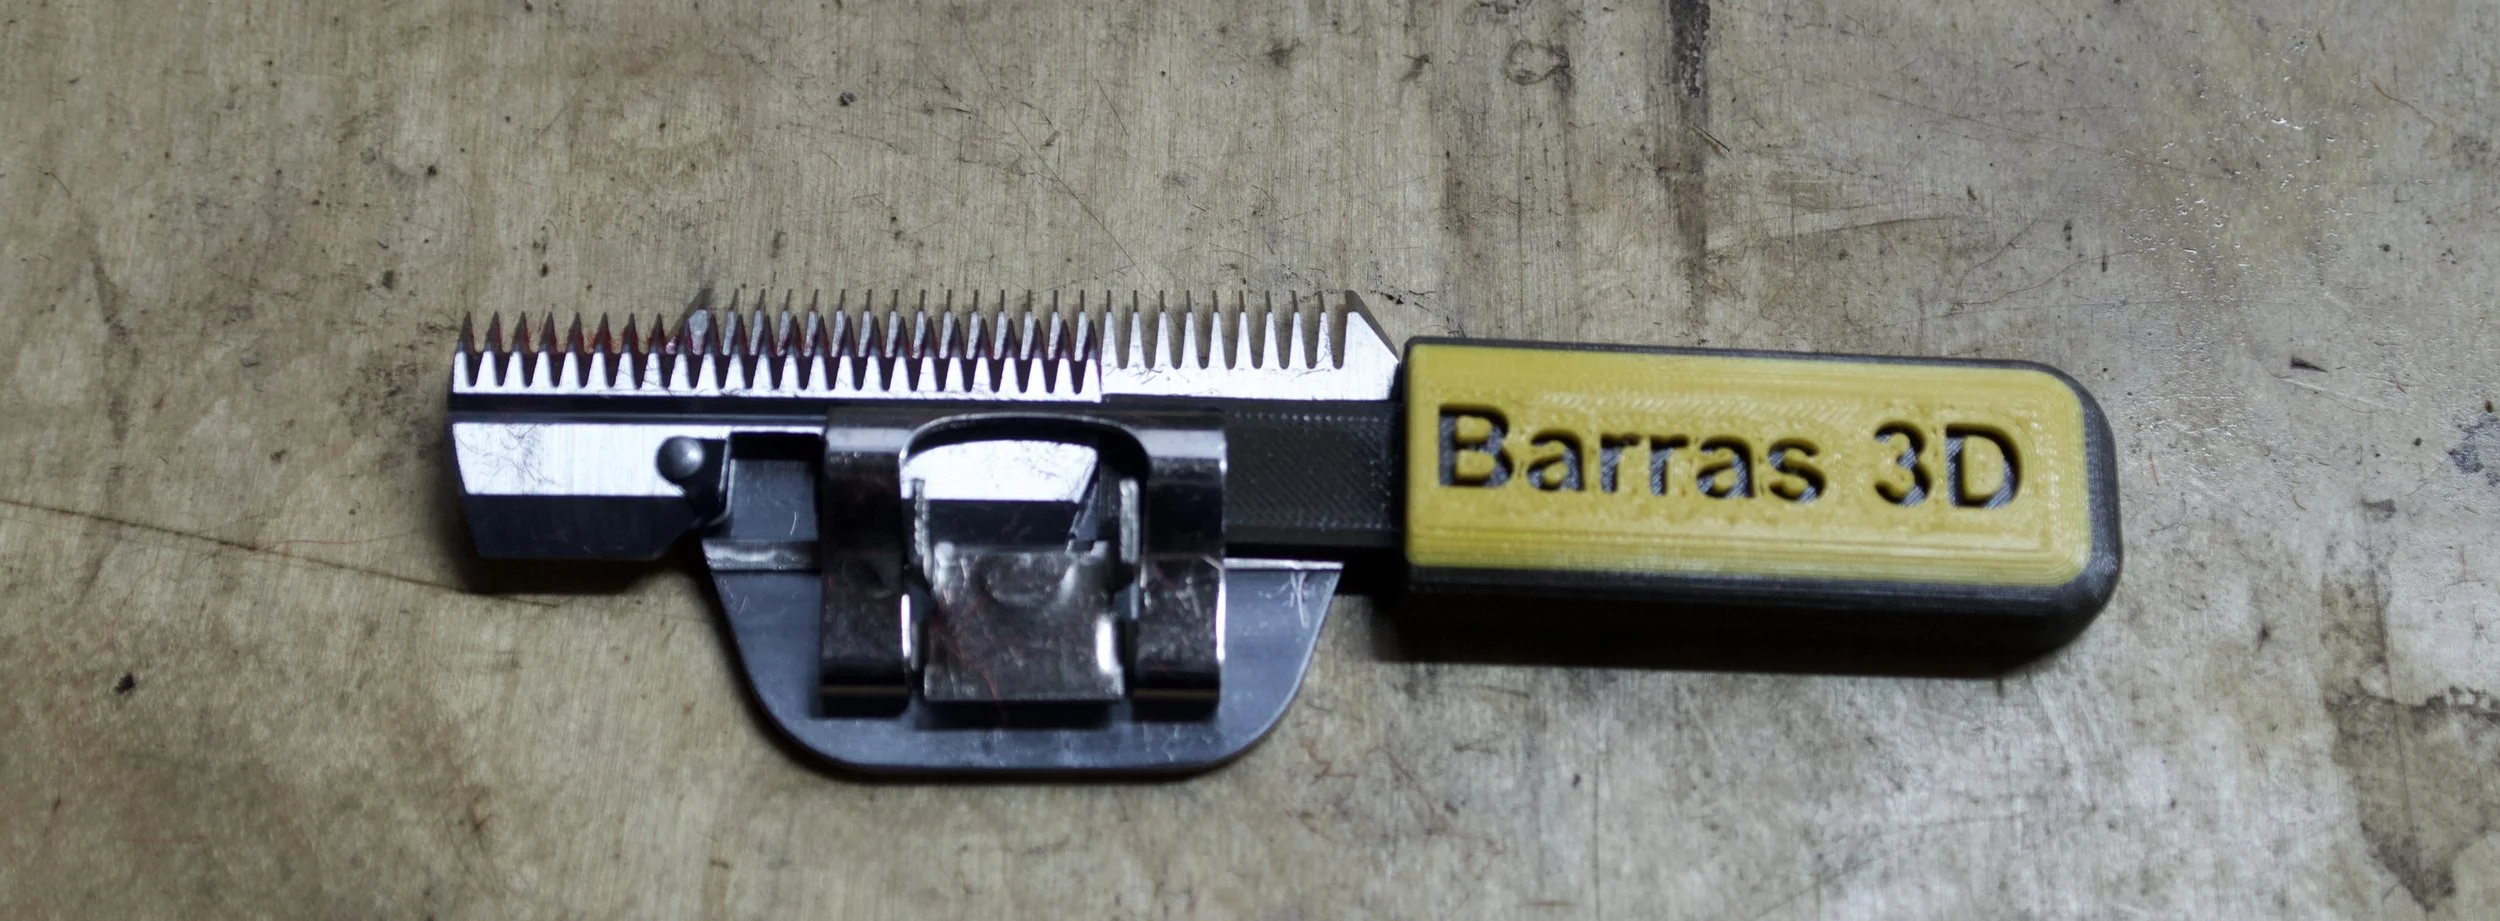
Blade Buddy
Thanks for buying the blade buddy. As you might note this page is hiding away in a corner of my sharpening business. Once sales pick-up i’ll launch a proper website as I already have the domain. But feel free to have a look around.
The history
The blade buddy hasn’t always been called the blade buddy. When it first popped into existence it was called the blade push.
I made it as a sharpener for a customer who kept flicking the cutters out of her clipper blades when she was trying to clean her blades. She was calling me out too often which made me try to think of a solution as I am a terrible businessmen who tries to find permeant solutions to customer problems instead of taking advantage of them.
I thought of various complicated solutions to limit the travel of the cutter but as there is so many different shapes and sizes of clipper blades. I could not think of any good solutions. There is another blade cleaning jig on the market which is exceedingly complicated and if something is difficult, you won’t use it.
I then came to it from another direction. Instead of trying to limit the travel of the cutter, let's limit the travel of the thing pushing the cutter.
That turned out to be quite easy with some slightly clever geometry around common features of clipper blades.
I took the prototype to the customer and they loved it.
This made me feel a bit more confident in the design so I sent out a few more out to some more groomers and the feedback was again excellent.
And so the blade push popped into existence and I sold it online via my company website mostly via Facebook groomer groups.
2 years later with me selling 4 or 5 a week and a few other 3D printing projects doing well I managed to get myself a much better 3D printer.
This let me go from making 8 to 10 at a time to making 30 at a time.
This lets me push the blade push out into other retailers
And why the name change? A groomer said she loved her blade buddy and I thought I was a significantly better name so it stuck.
How to use your blade buddy
You’ll read this once as once you get the concept then you’ll find it very simple to use.
And if it is simple to use you’ll use it more meaning your blades are in better condition, which means less need to get them sharpened which means less work for me……. Why am doing this?
Grab a dirty blade and your blade buddy.
I’m right handed so I have the blade buddy in my right hand.
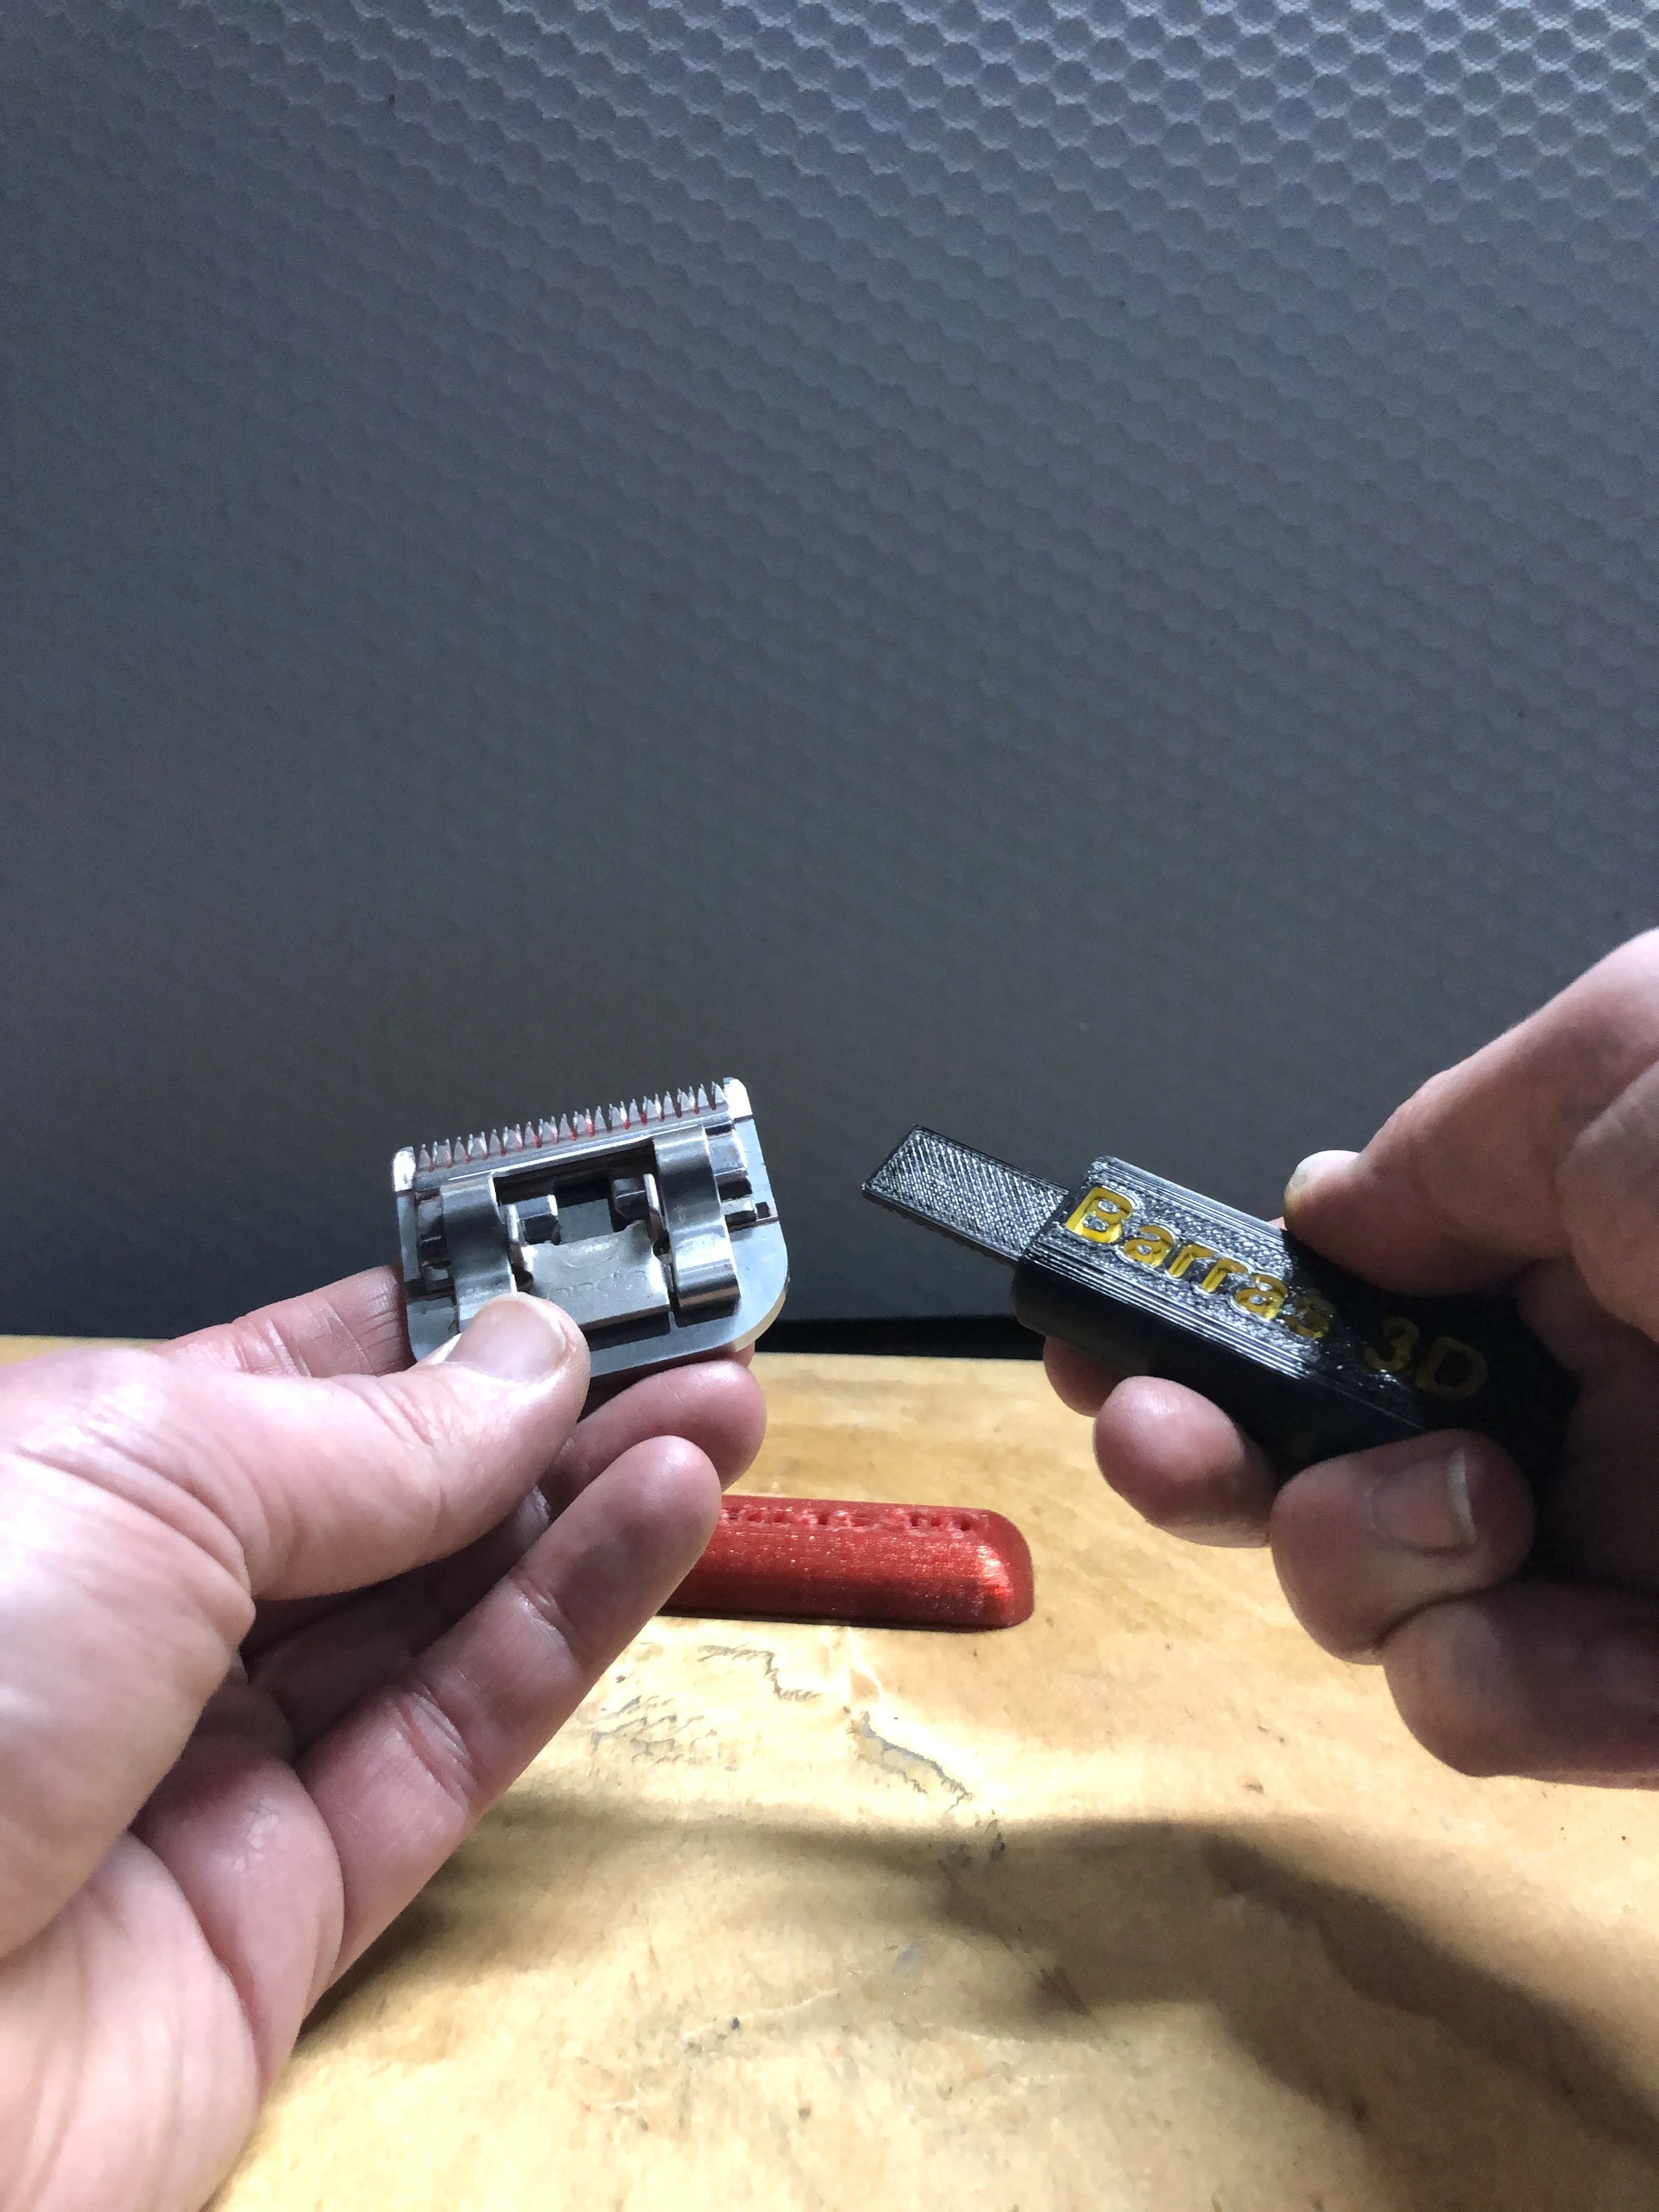
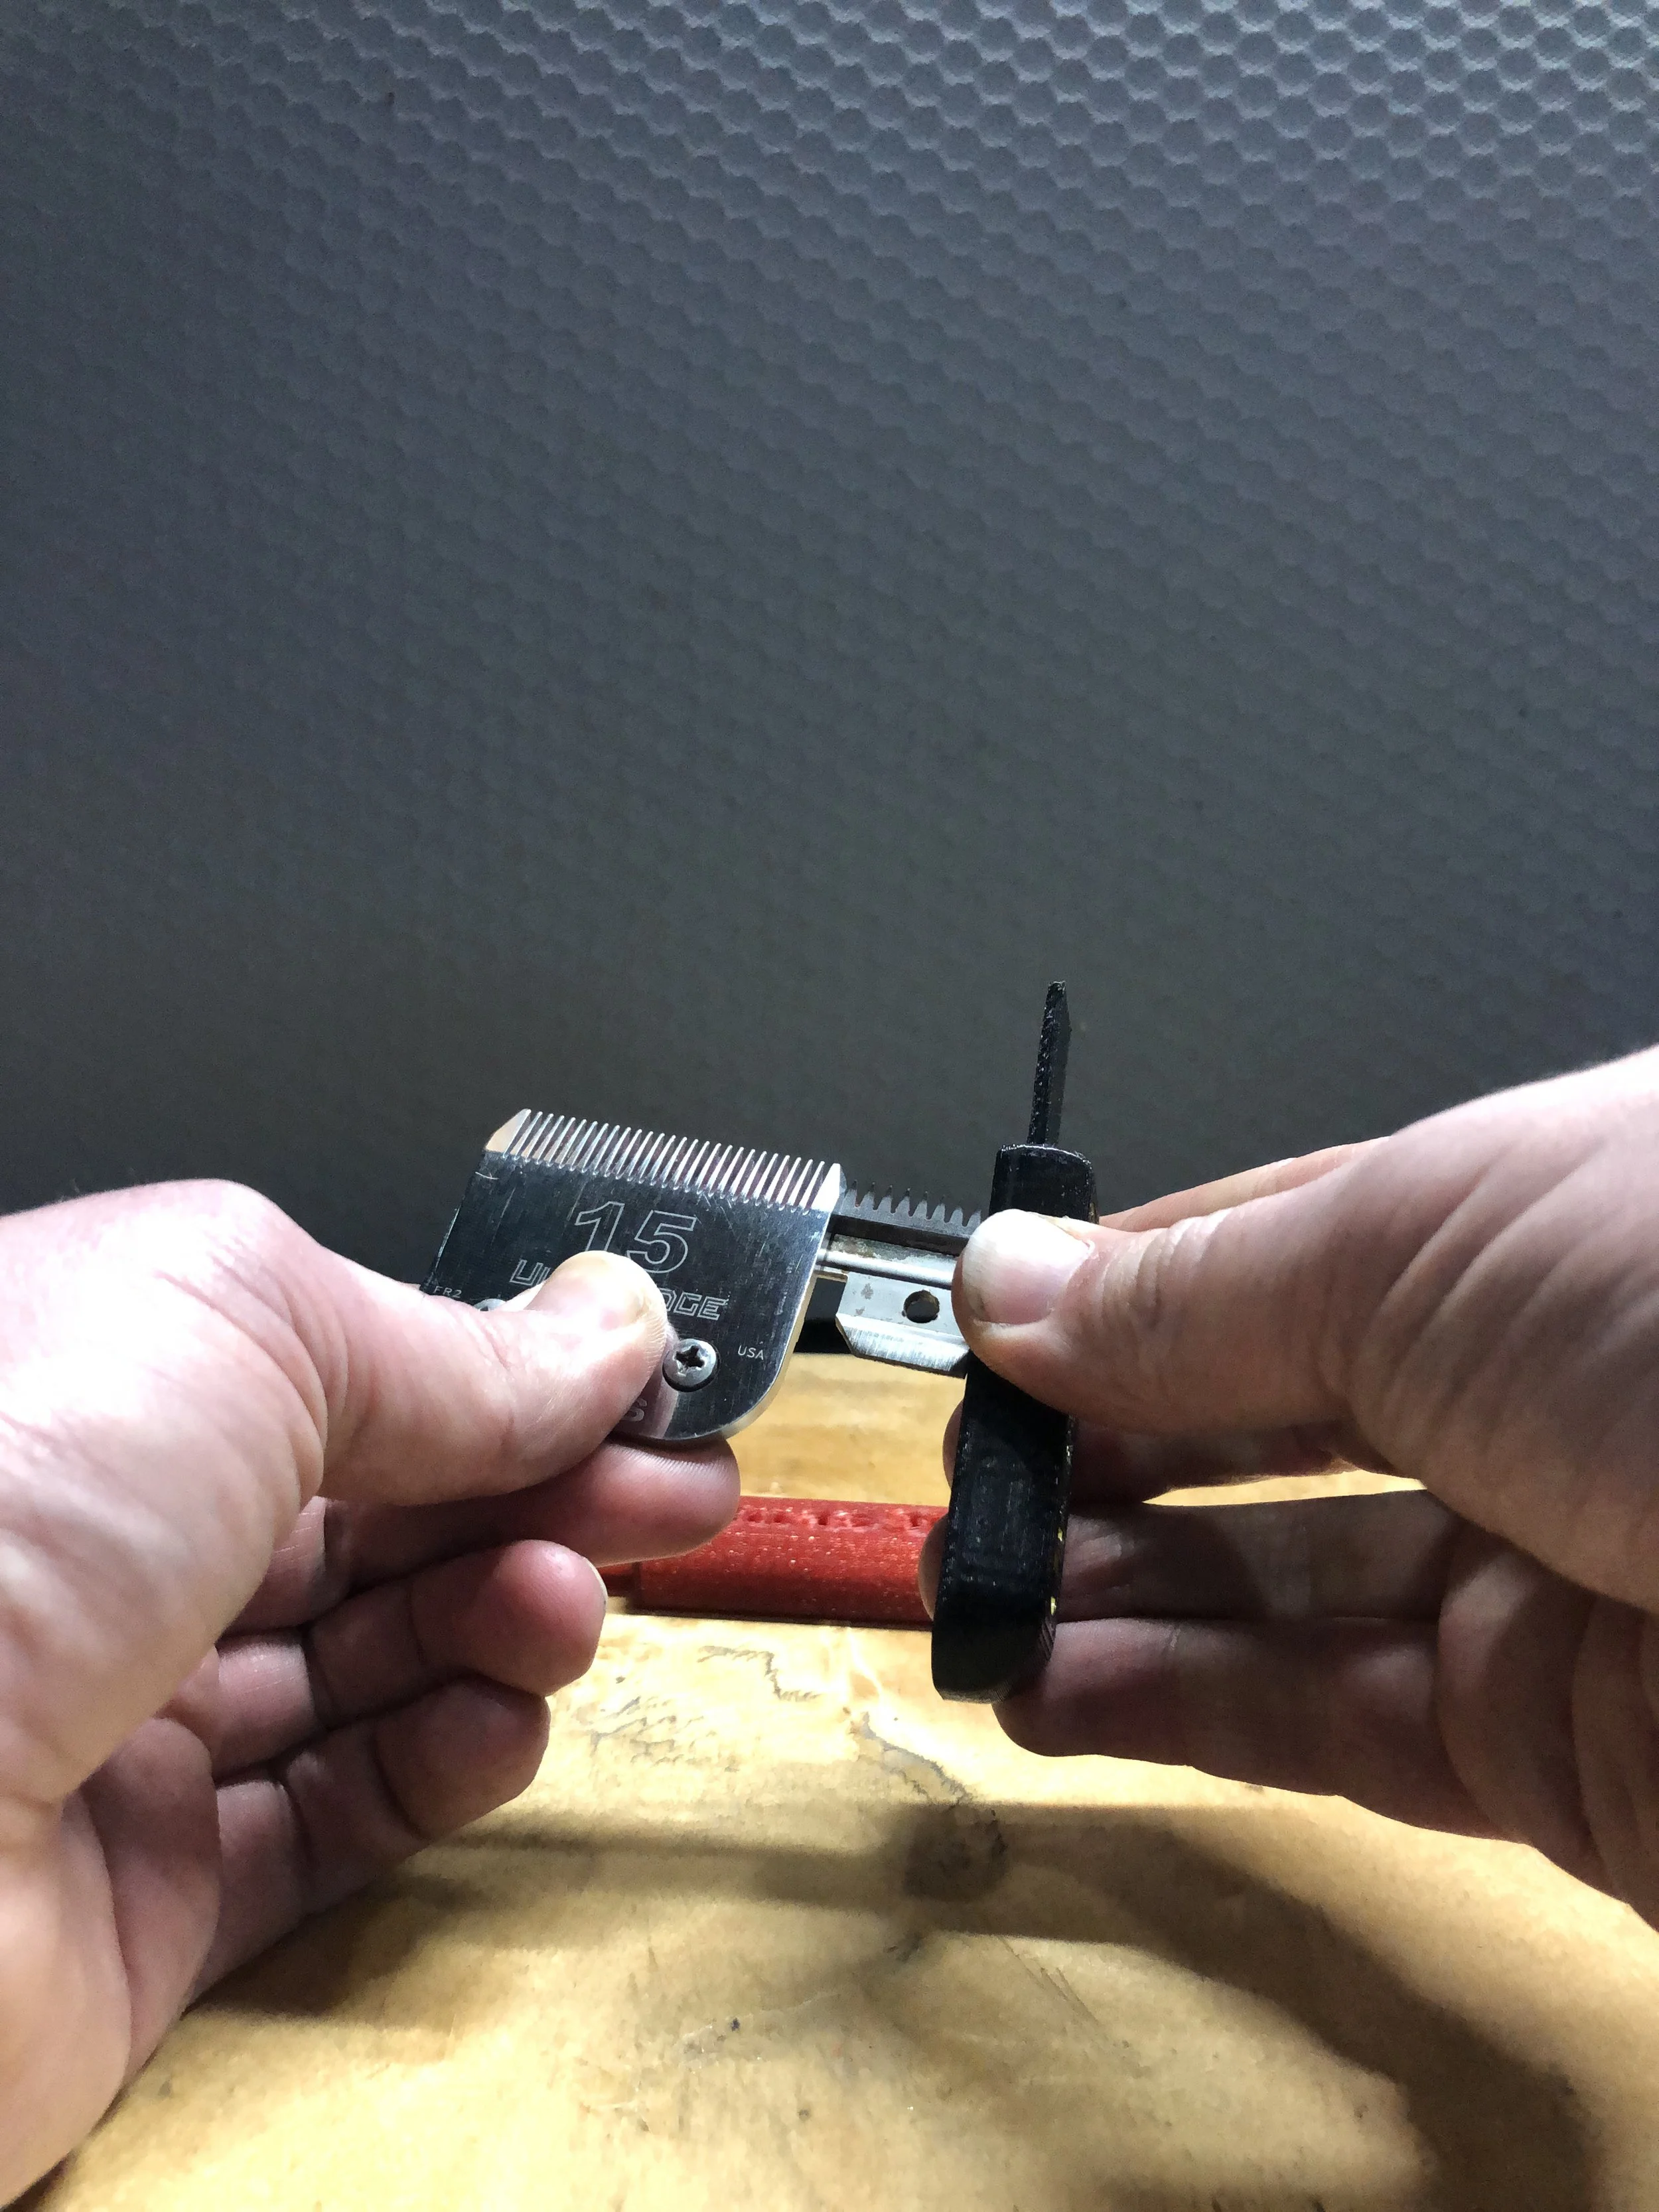
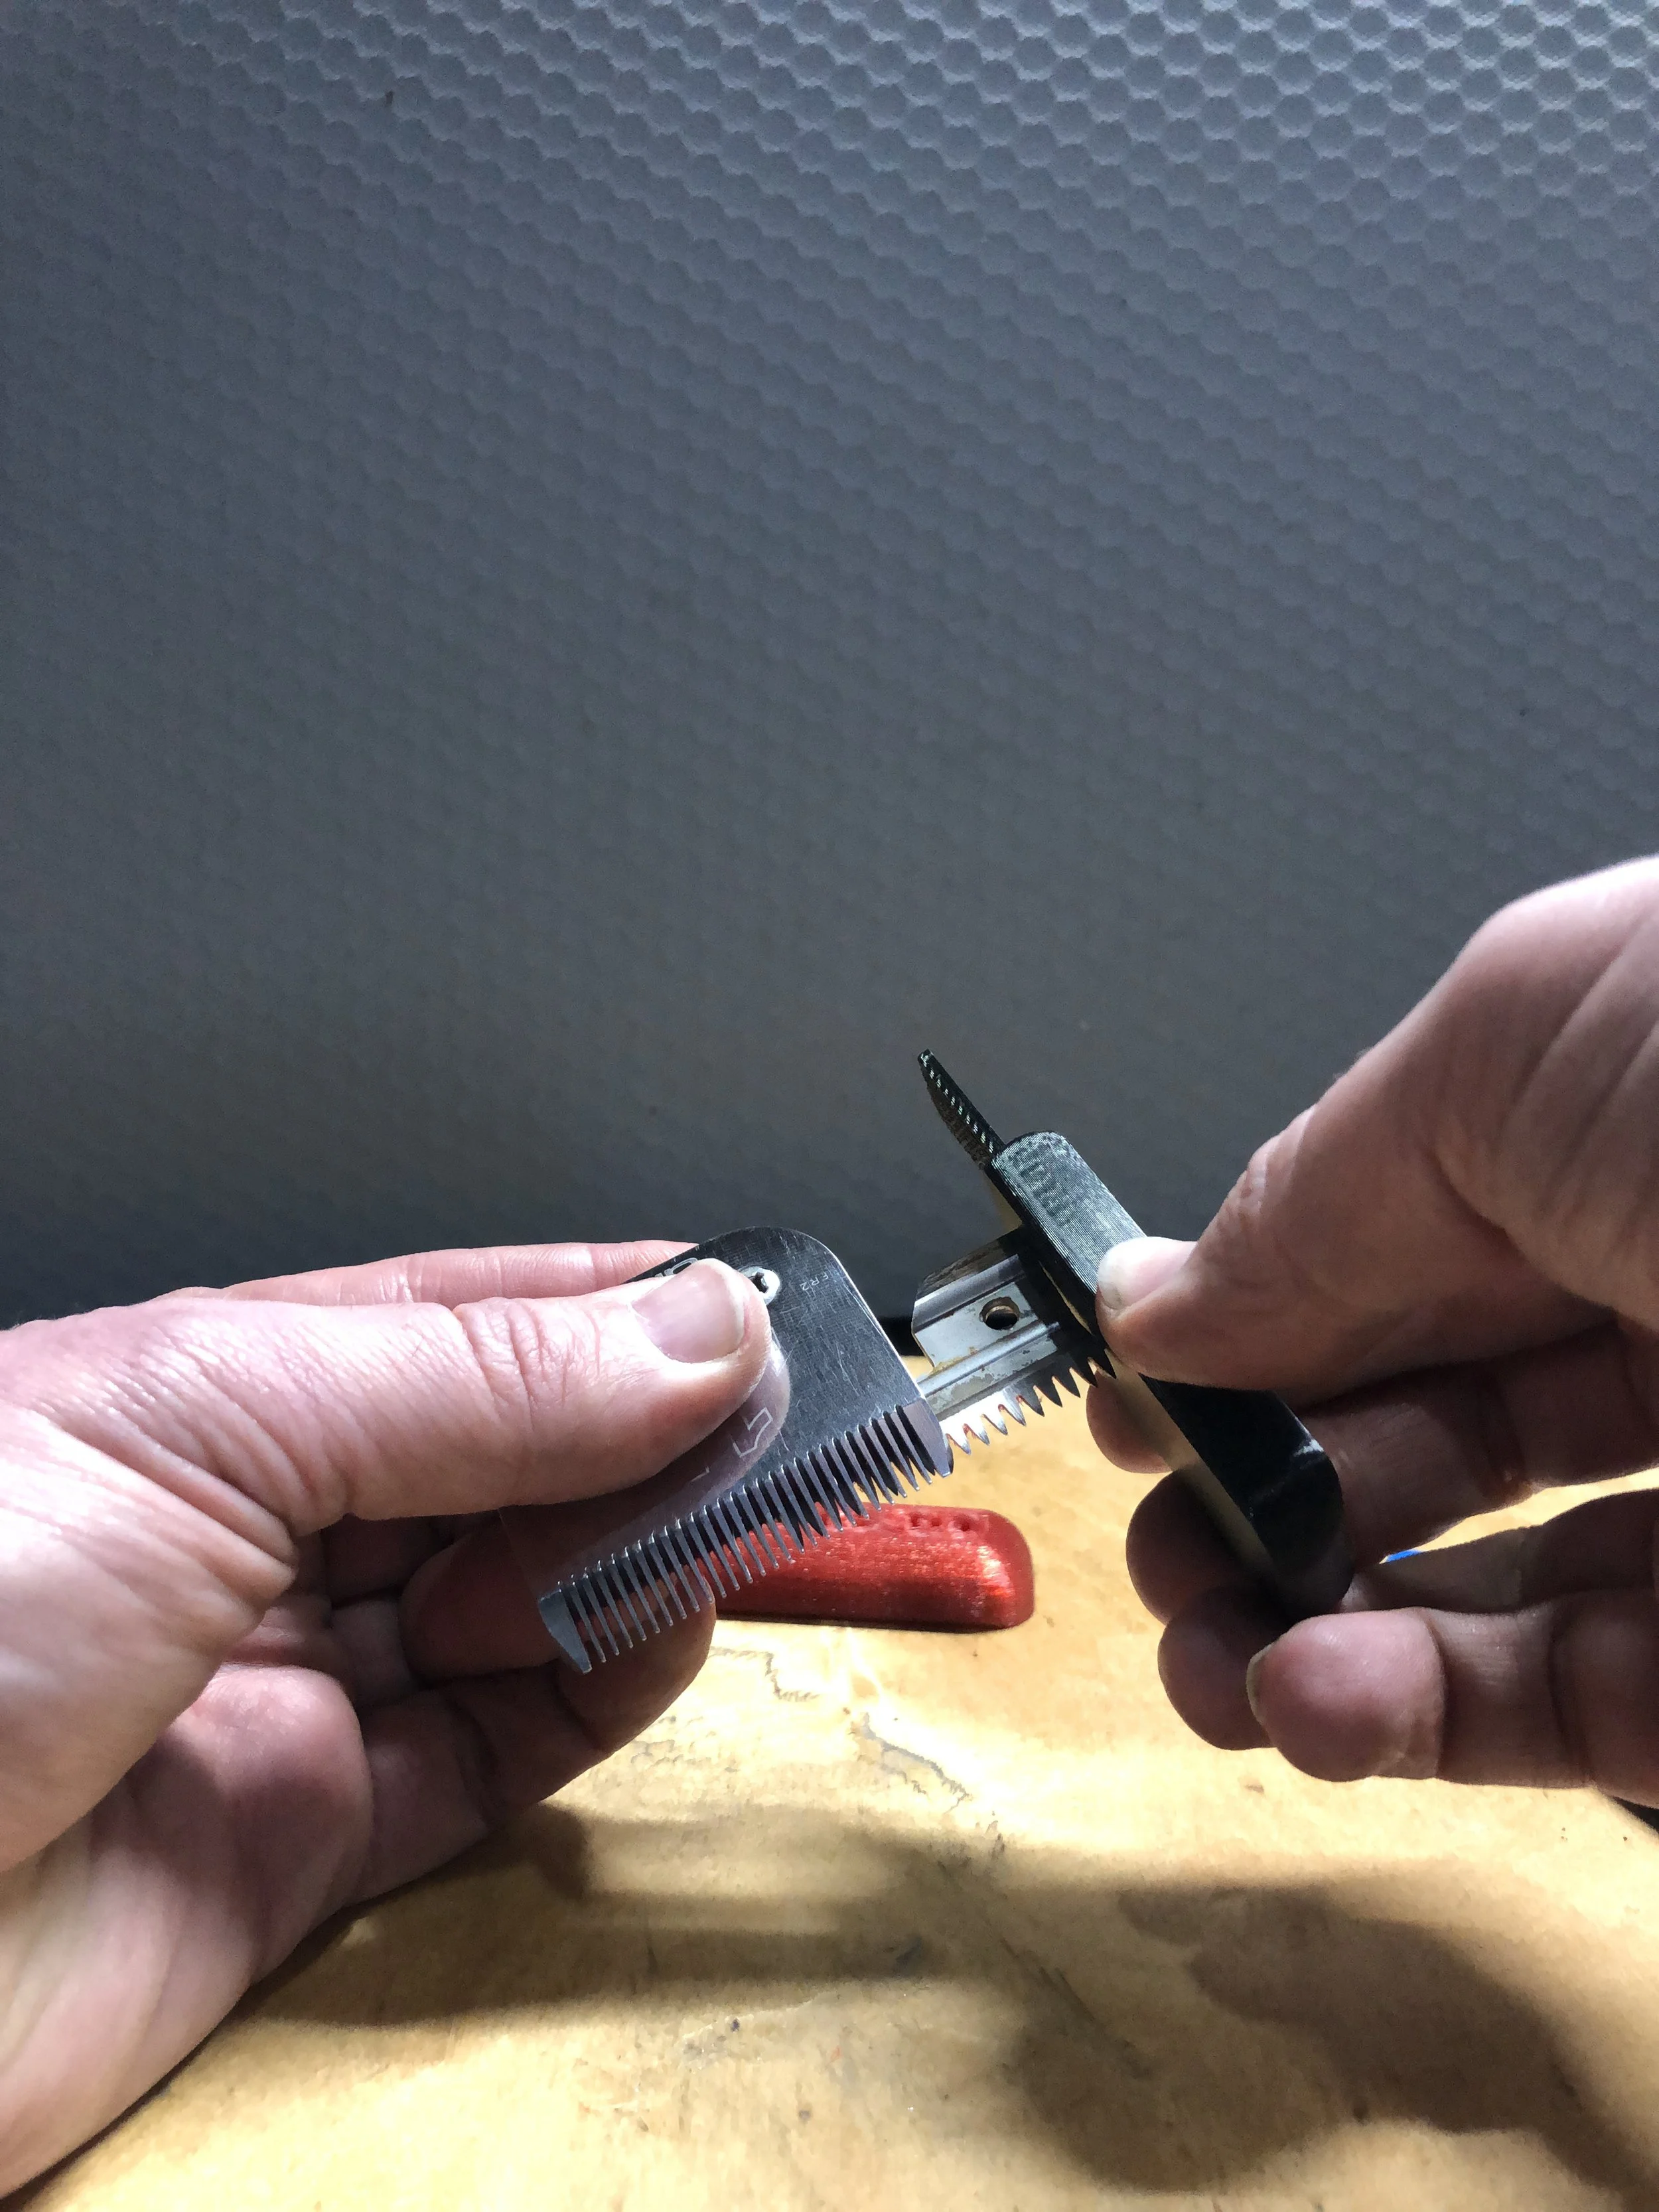
You’ll see two shiny rails on the blade where the cutter sits
Line up the end of the blade buddy between the two rails that the cutter runs on.
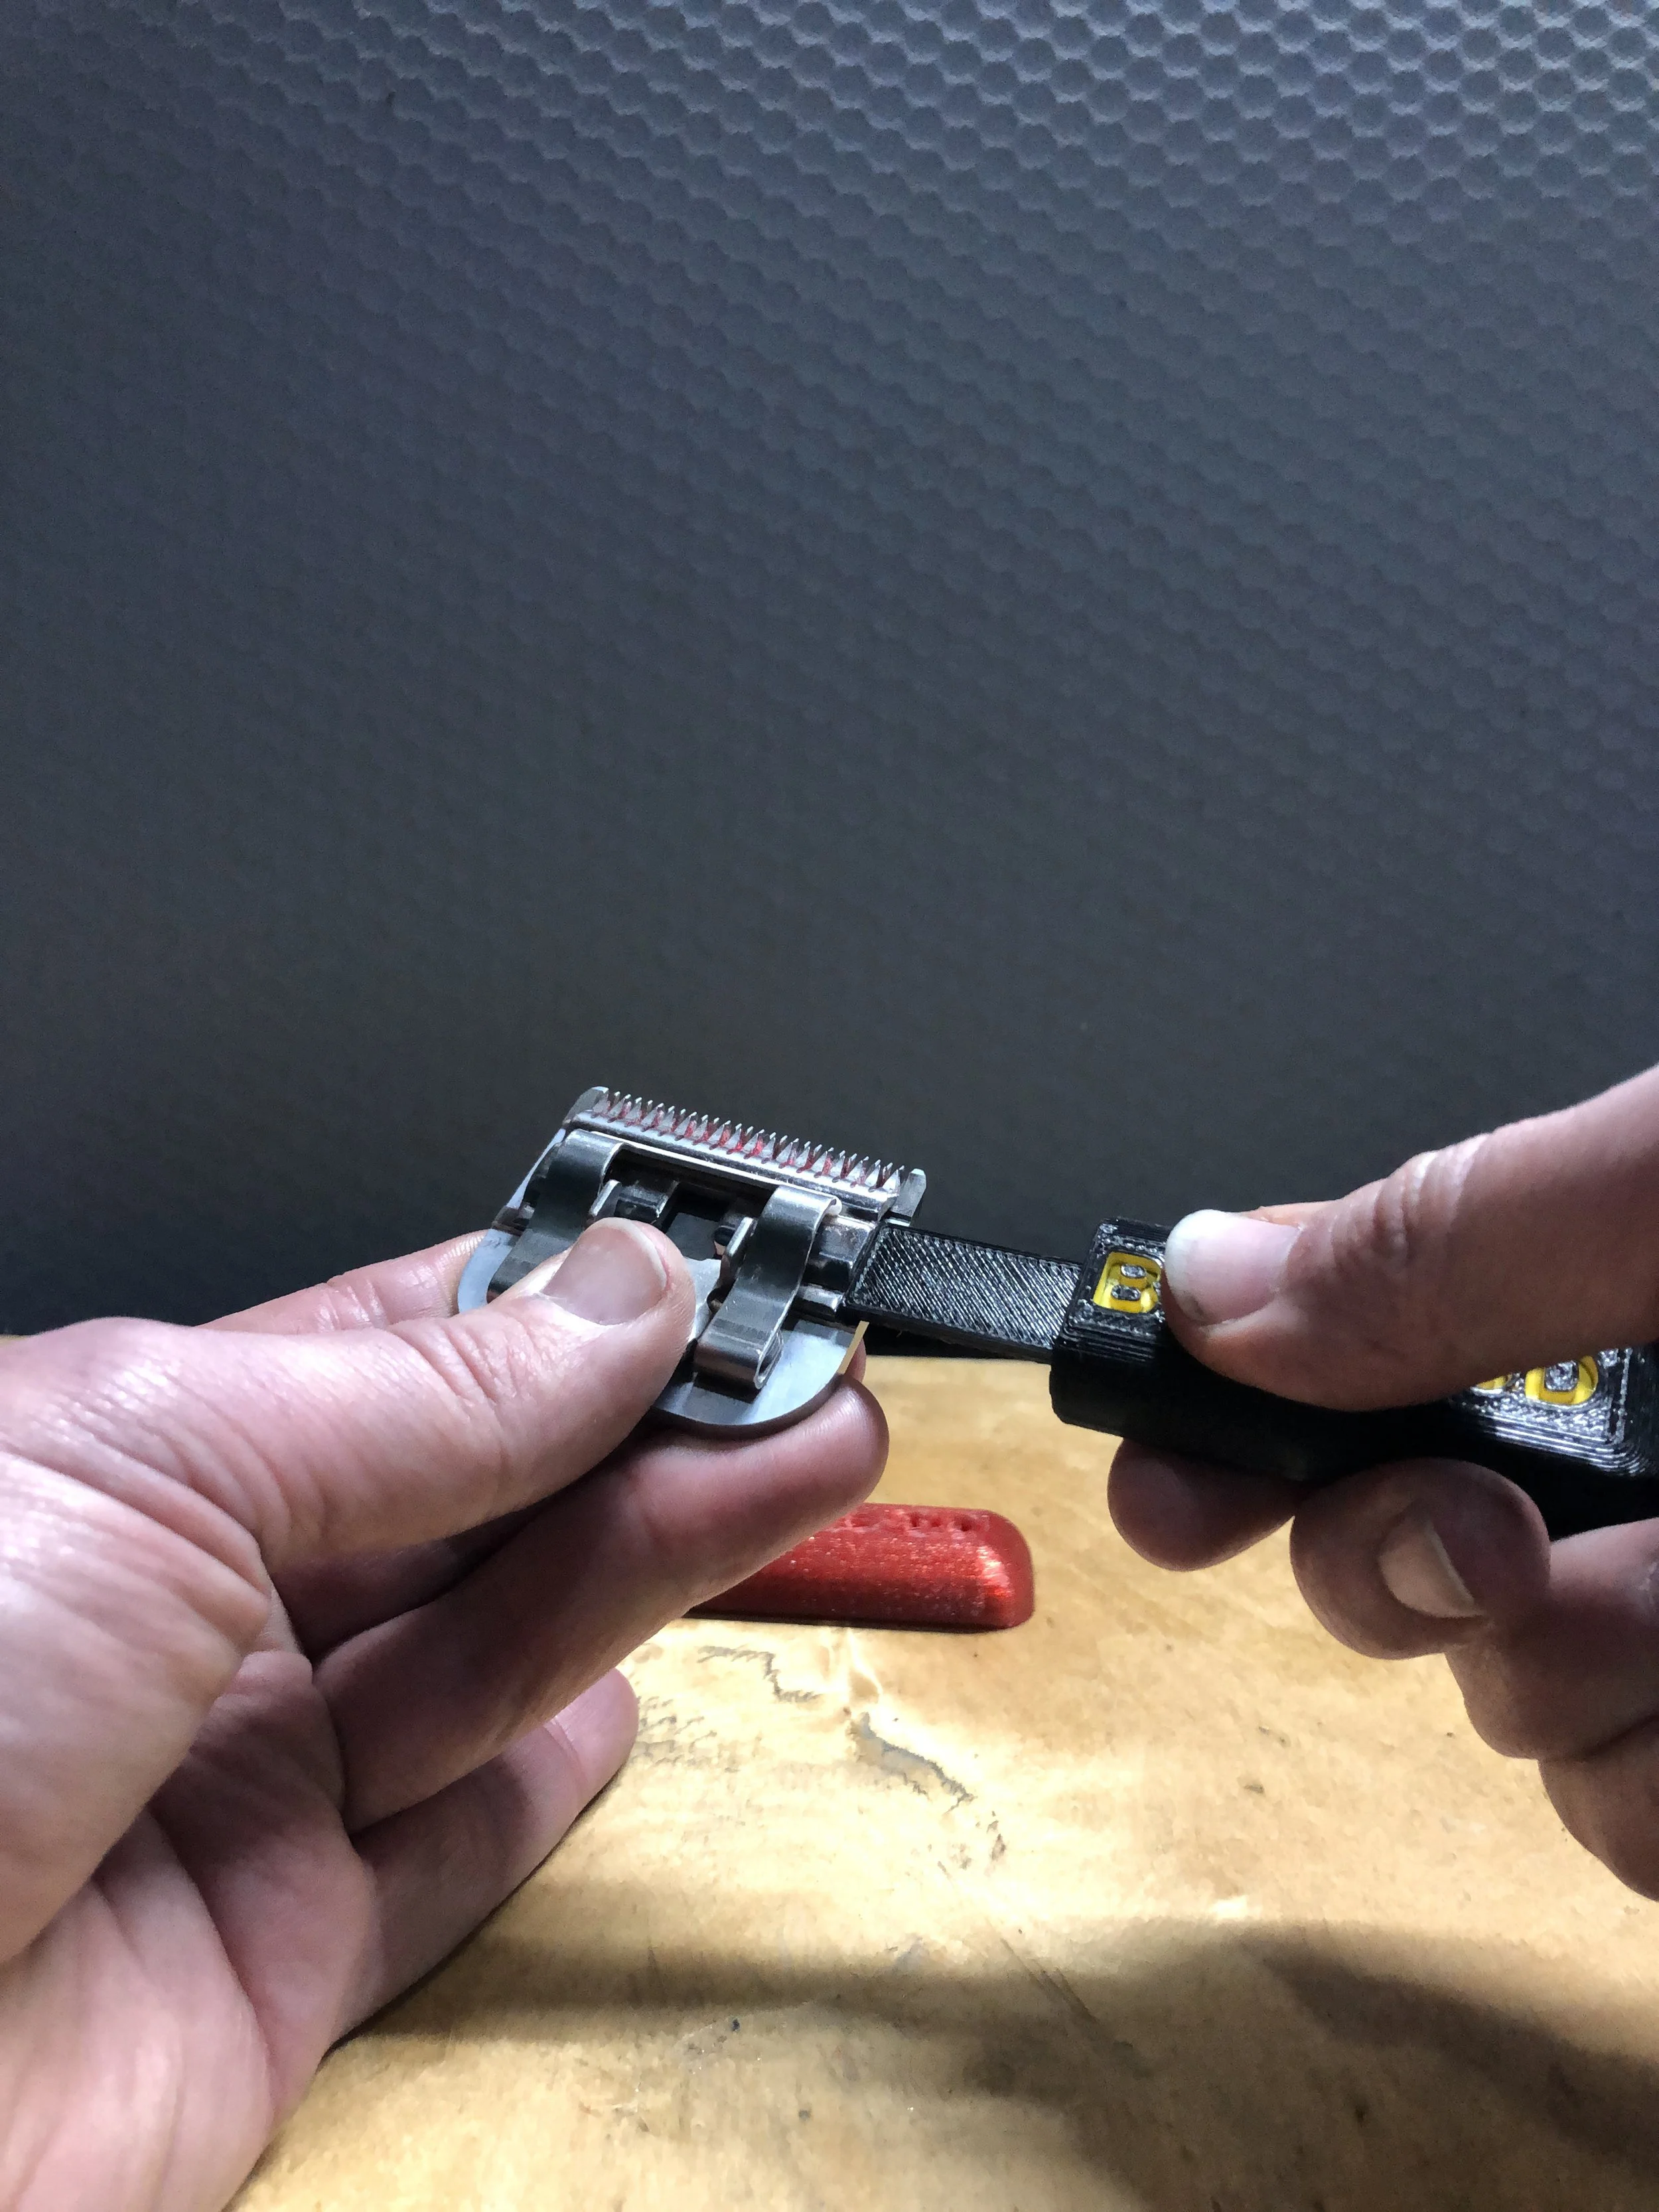
Press the end of the blade buddy against the cutter
Push the cutter across using the blade buddy.
Don’t worry about pushing too hard as the blade buddy is designed so that you can’t push the cutter out as the handle of the blade buddy will hit the side of the comb on the blade
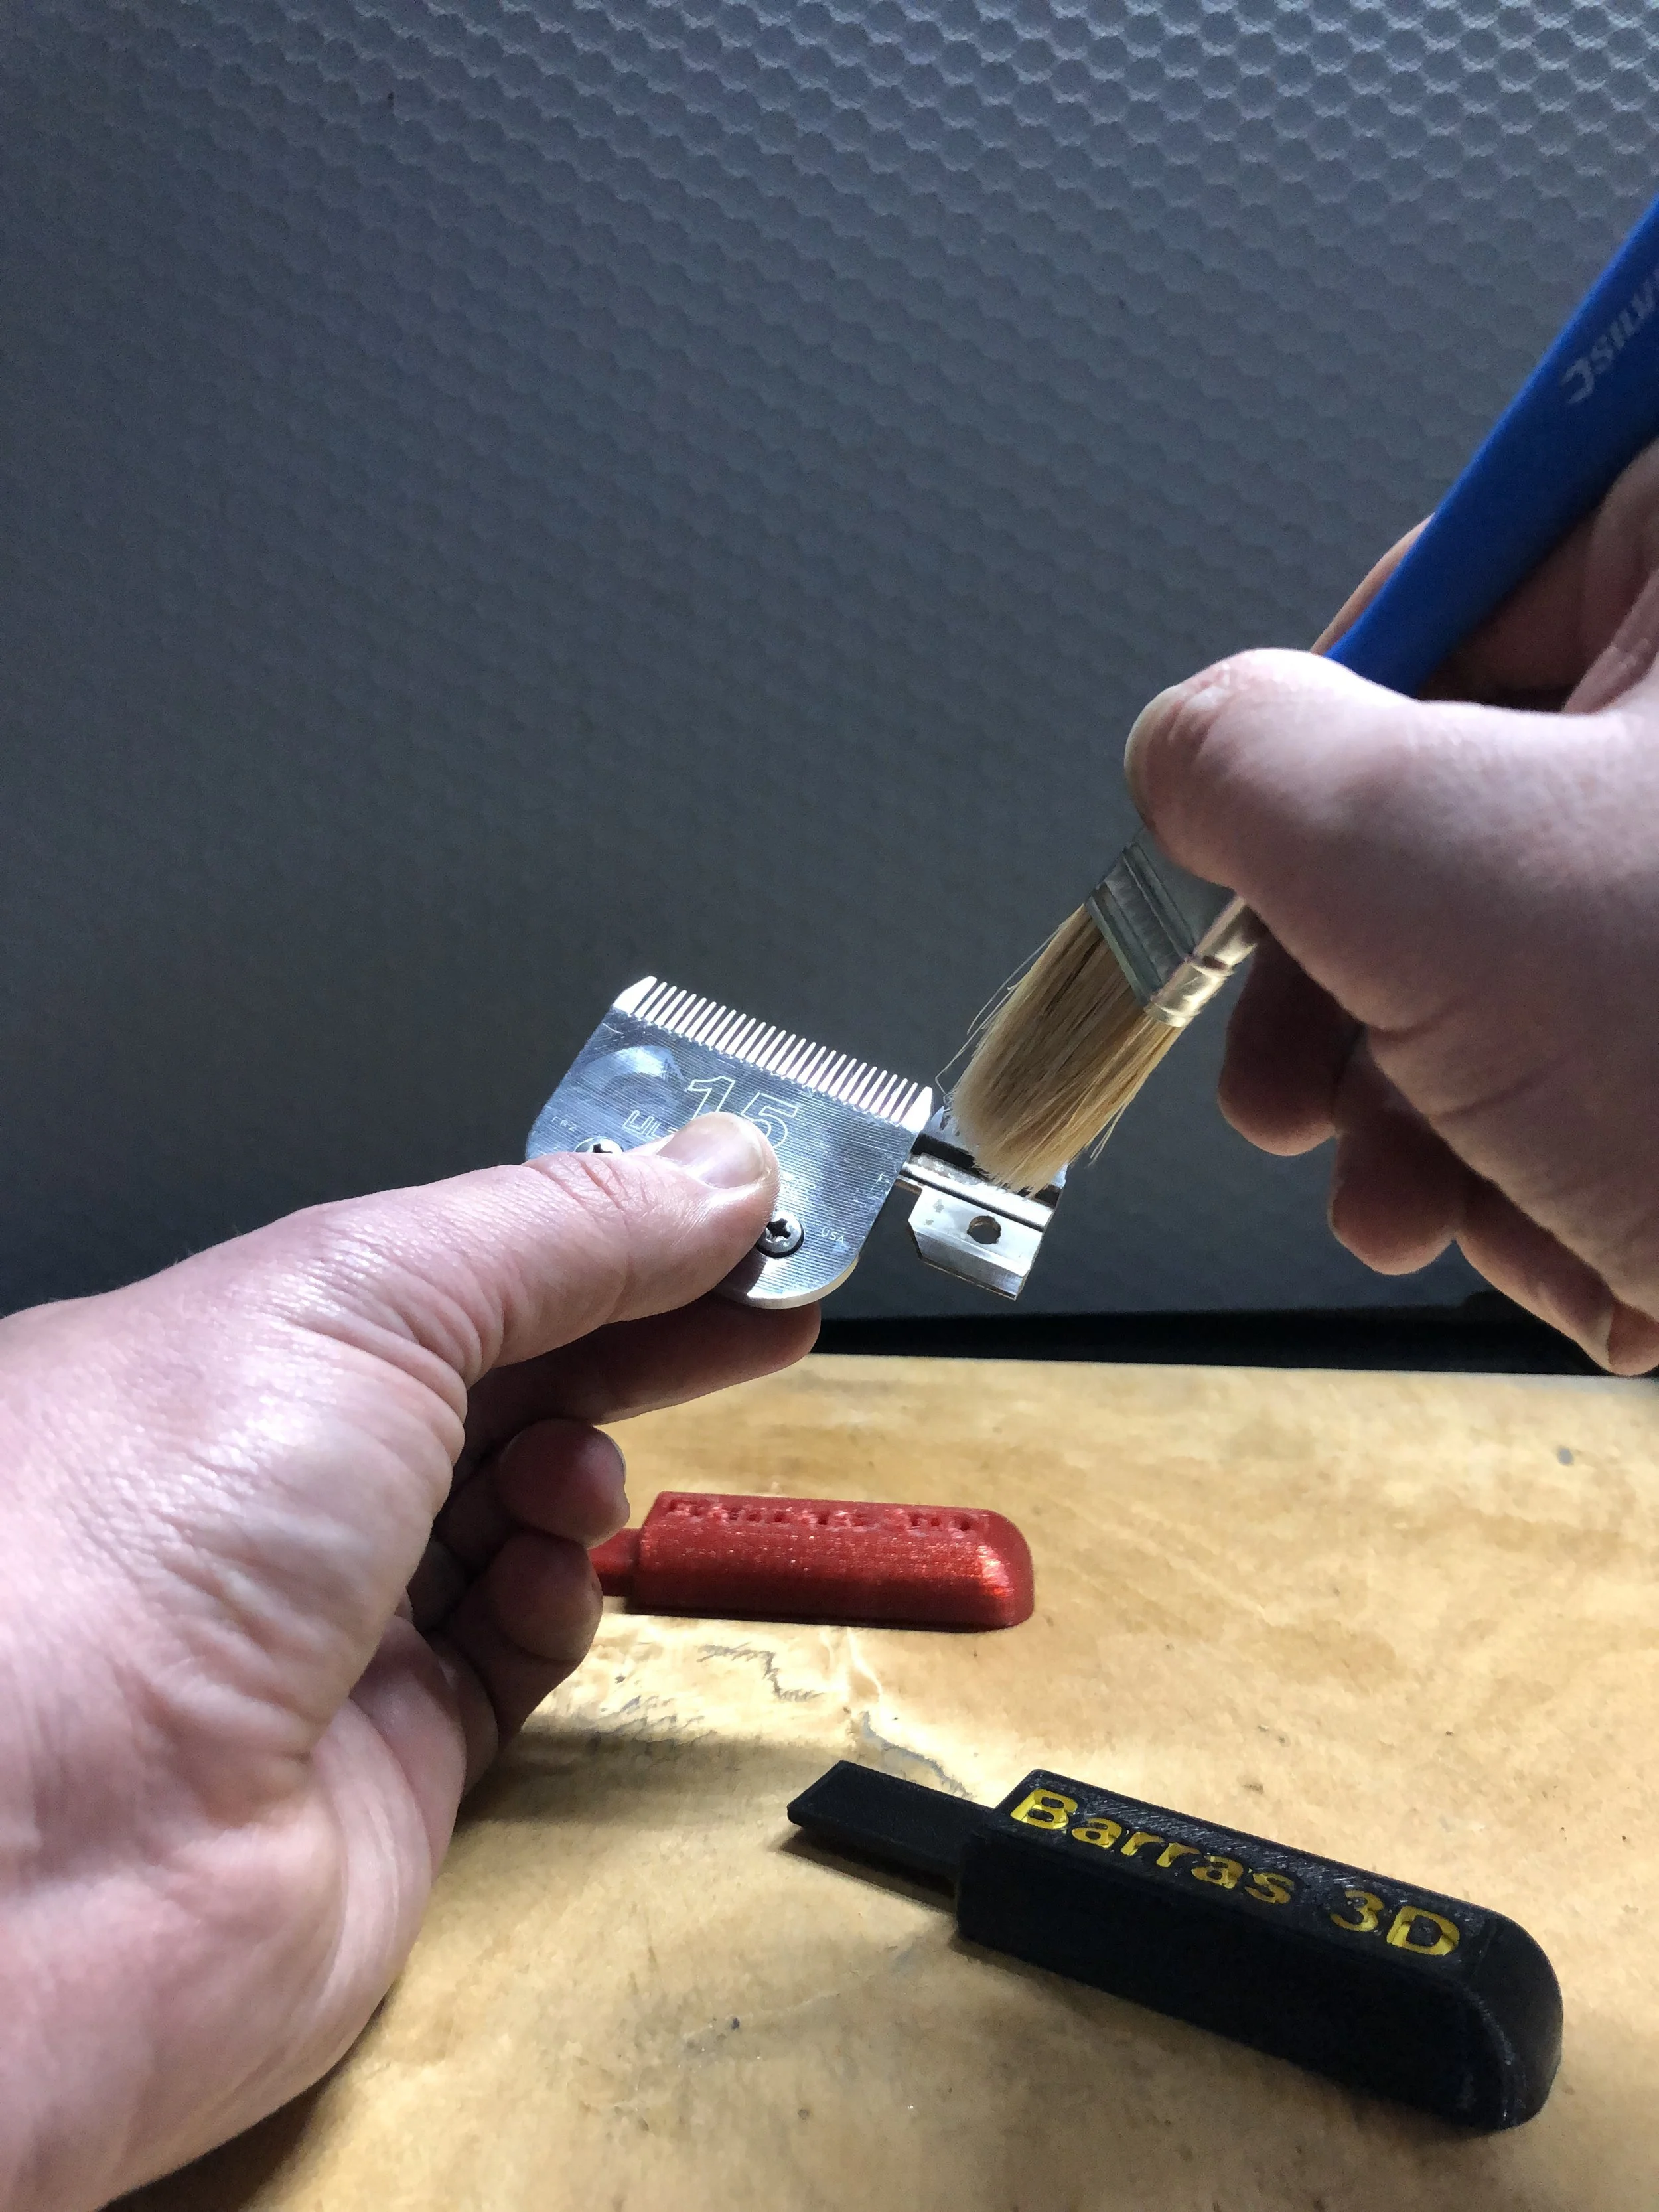
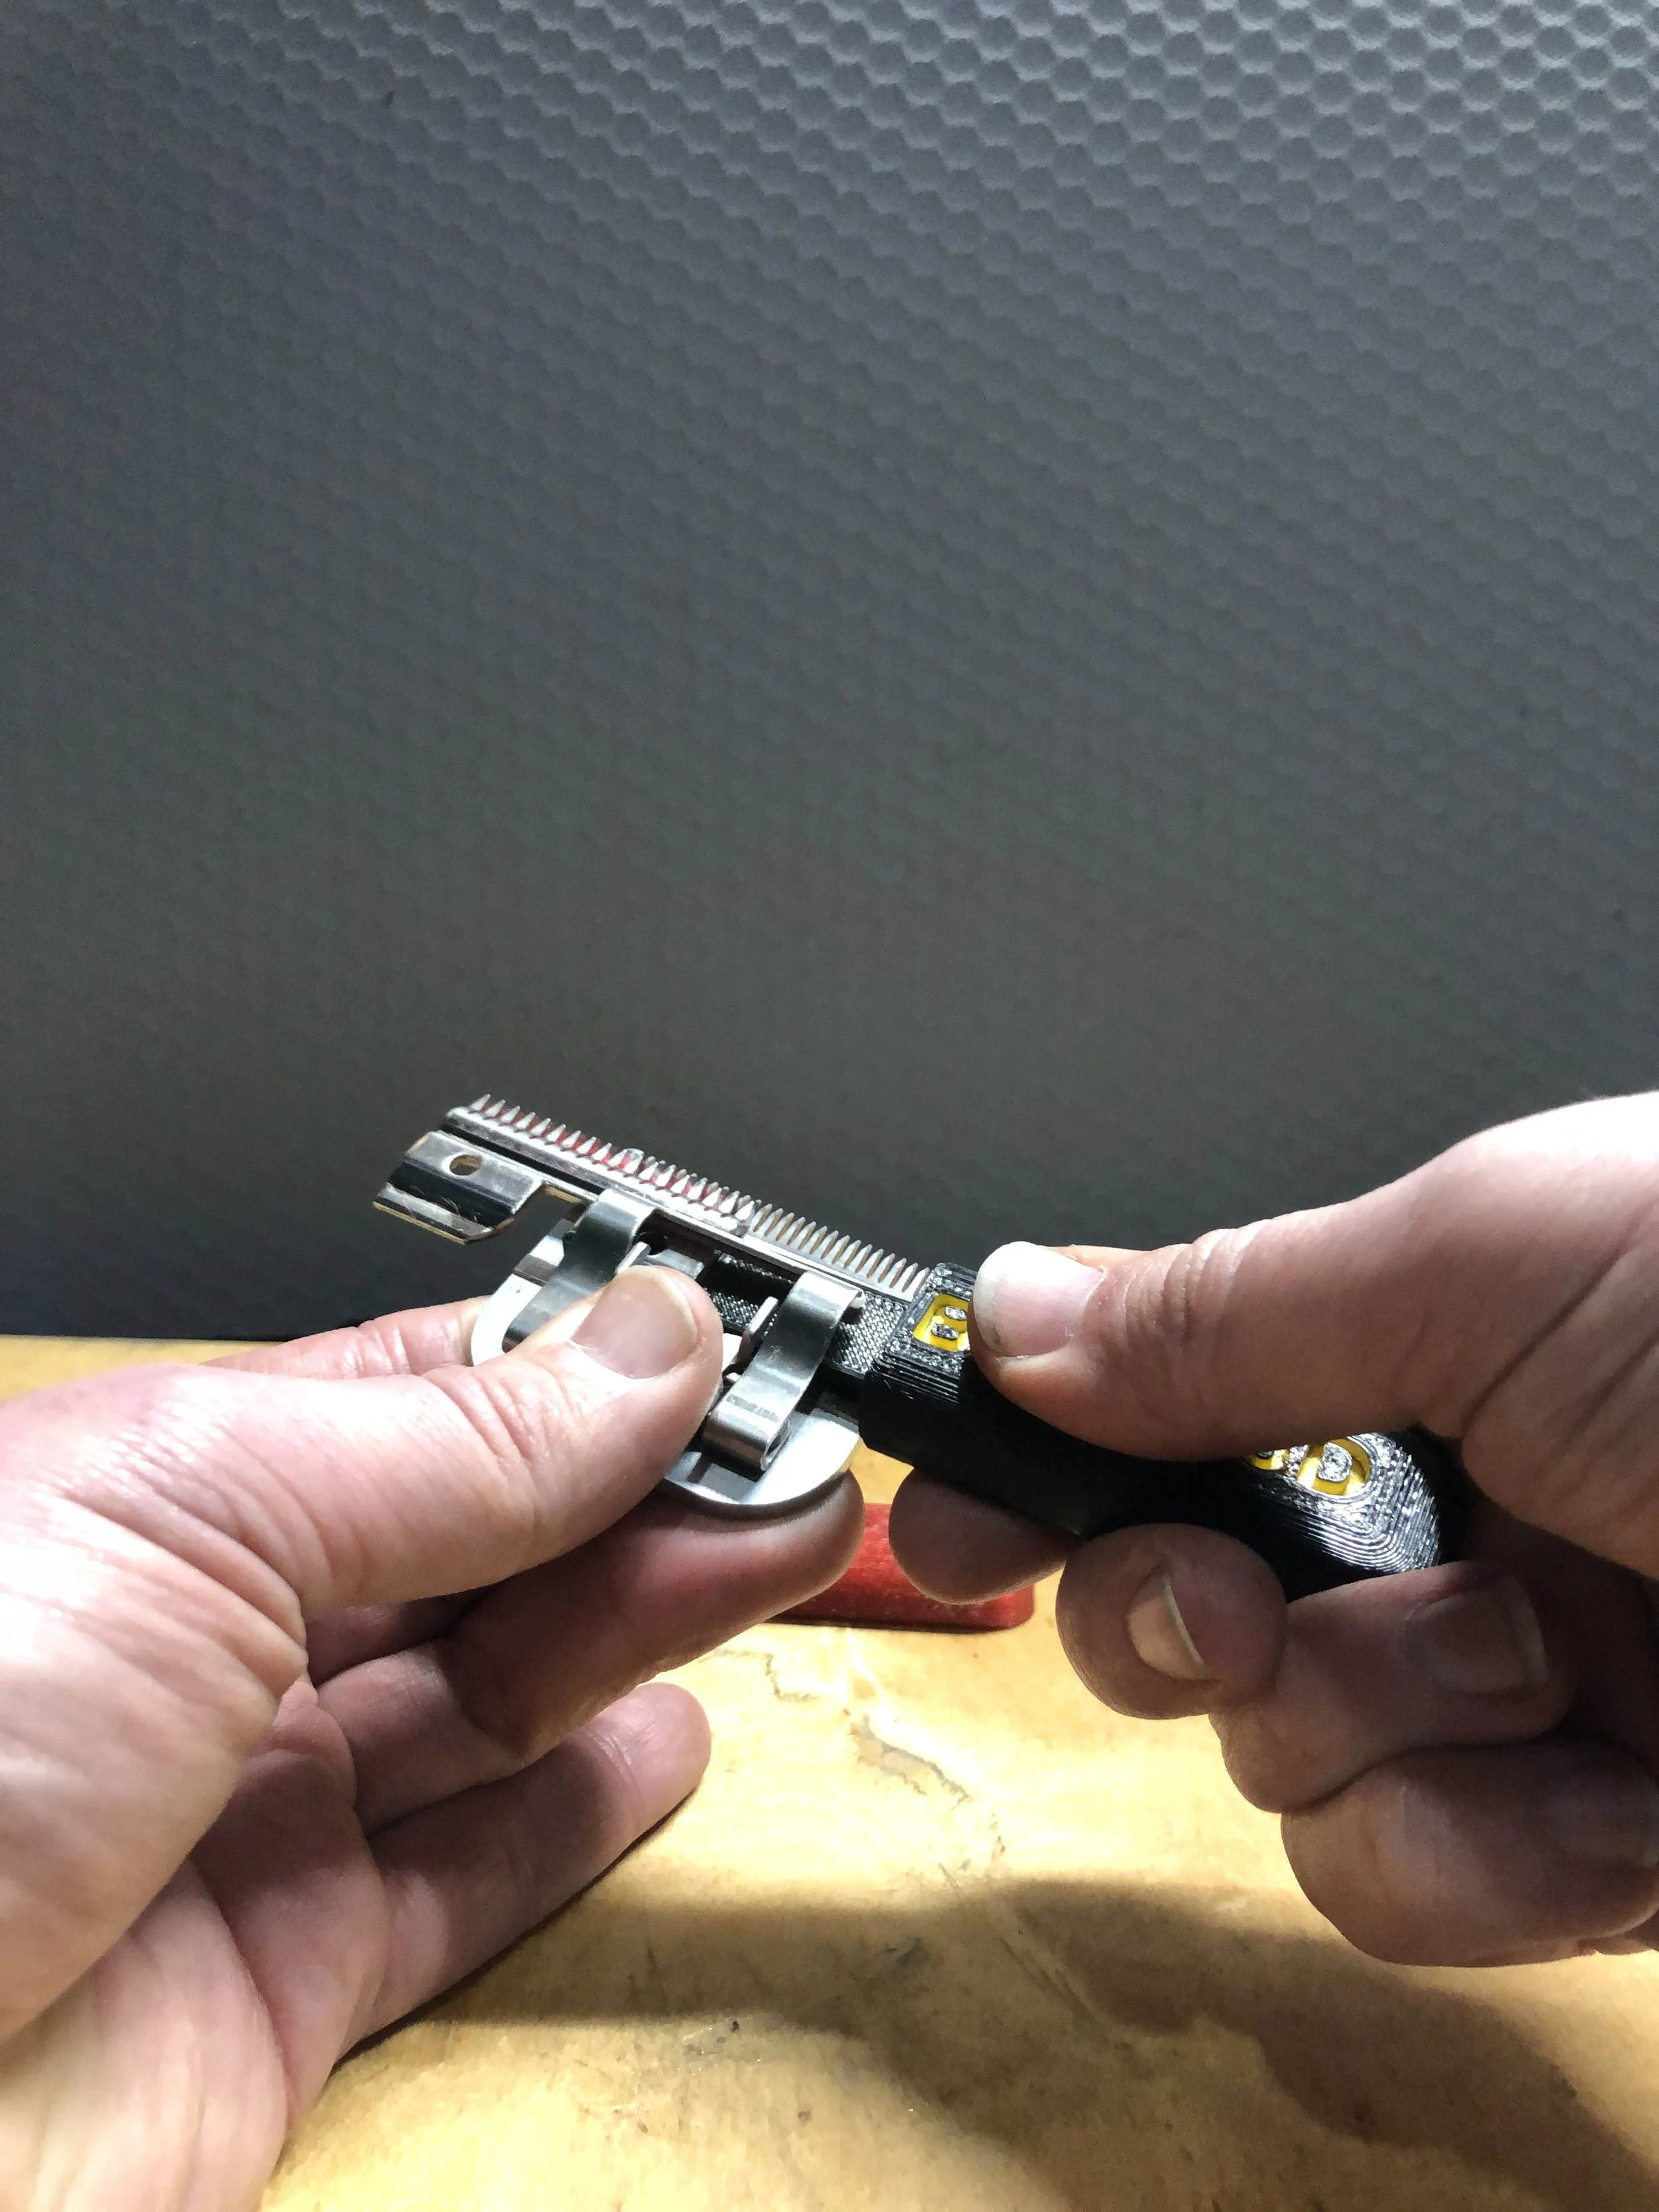
Clean in behind the cutter.
A paint brush is a pretty good tool and can be bought for pennies
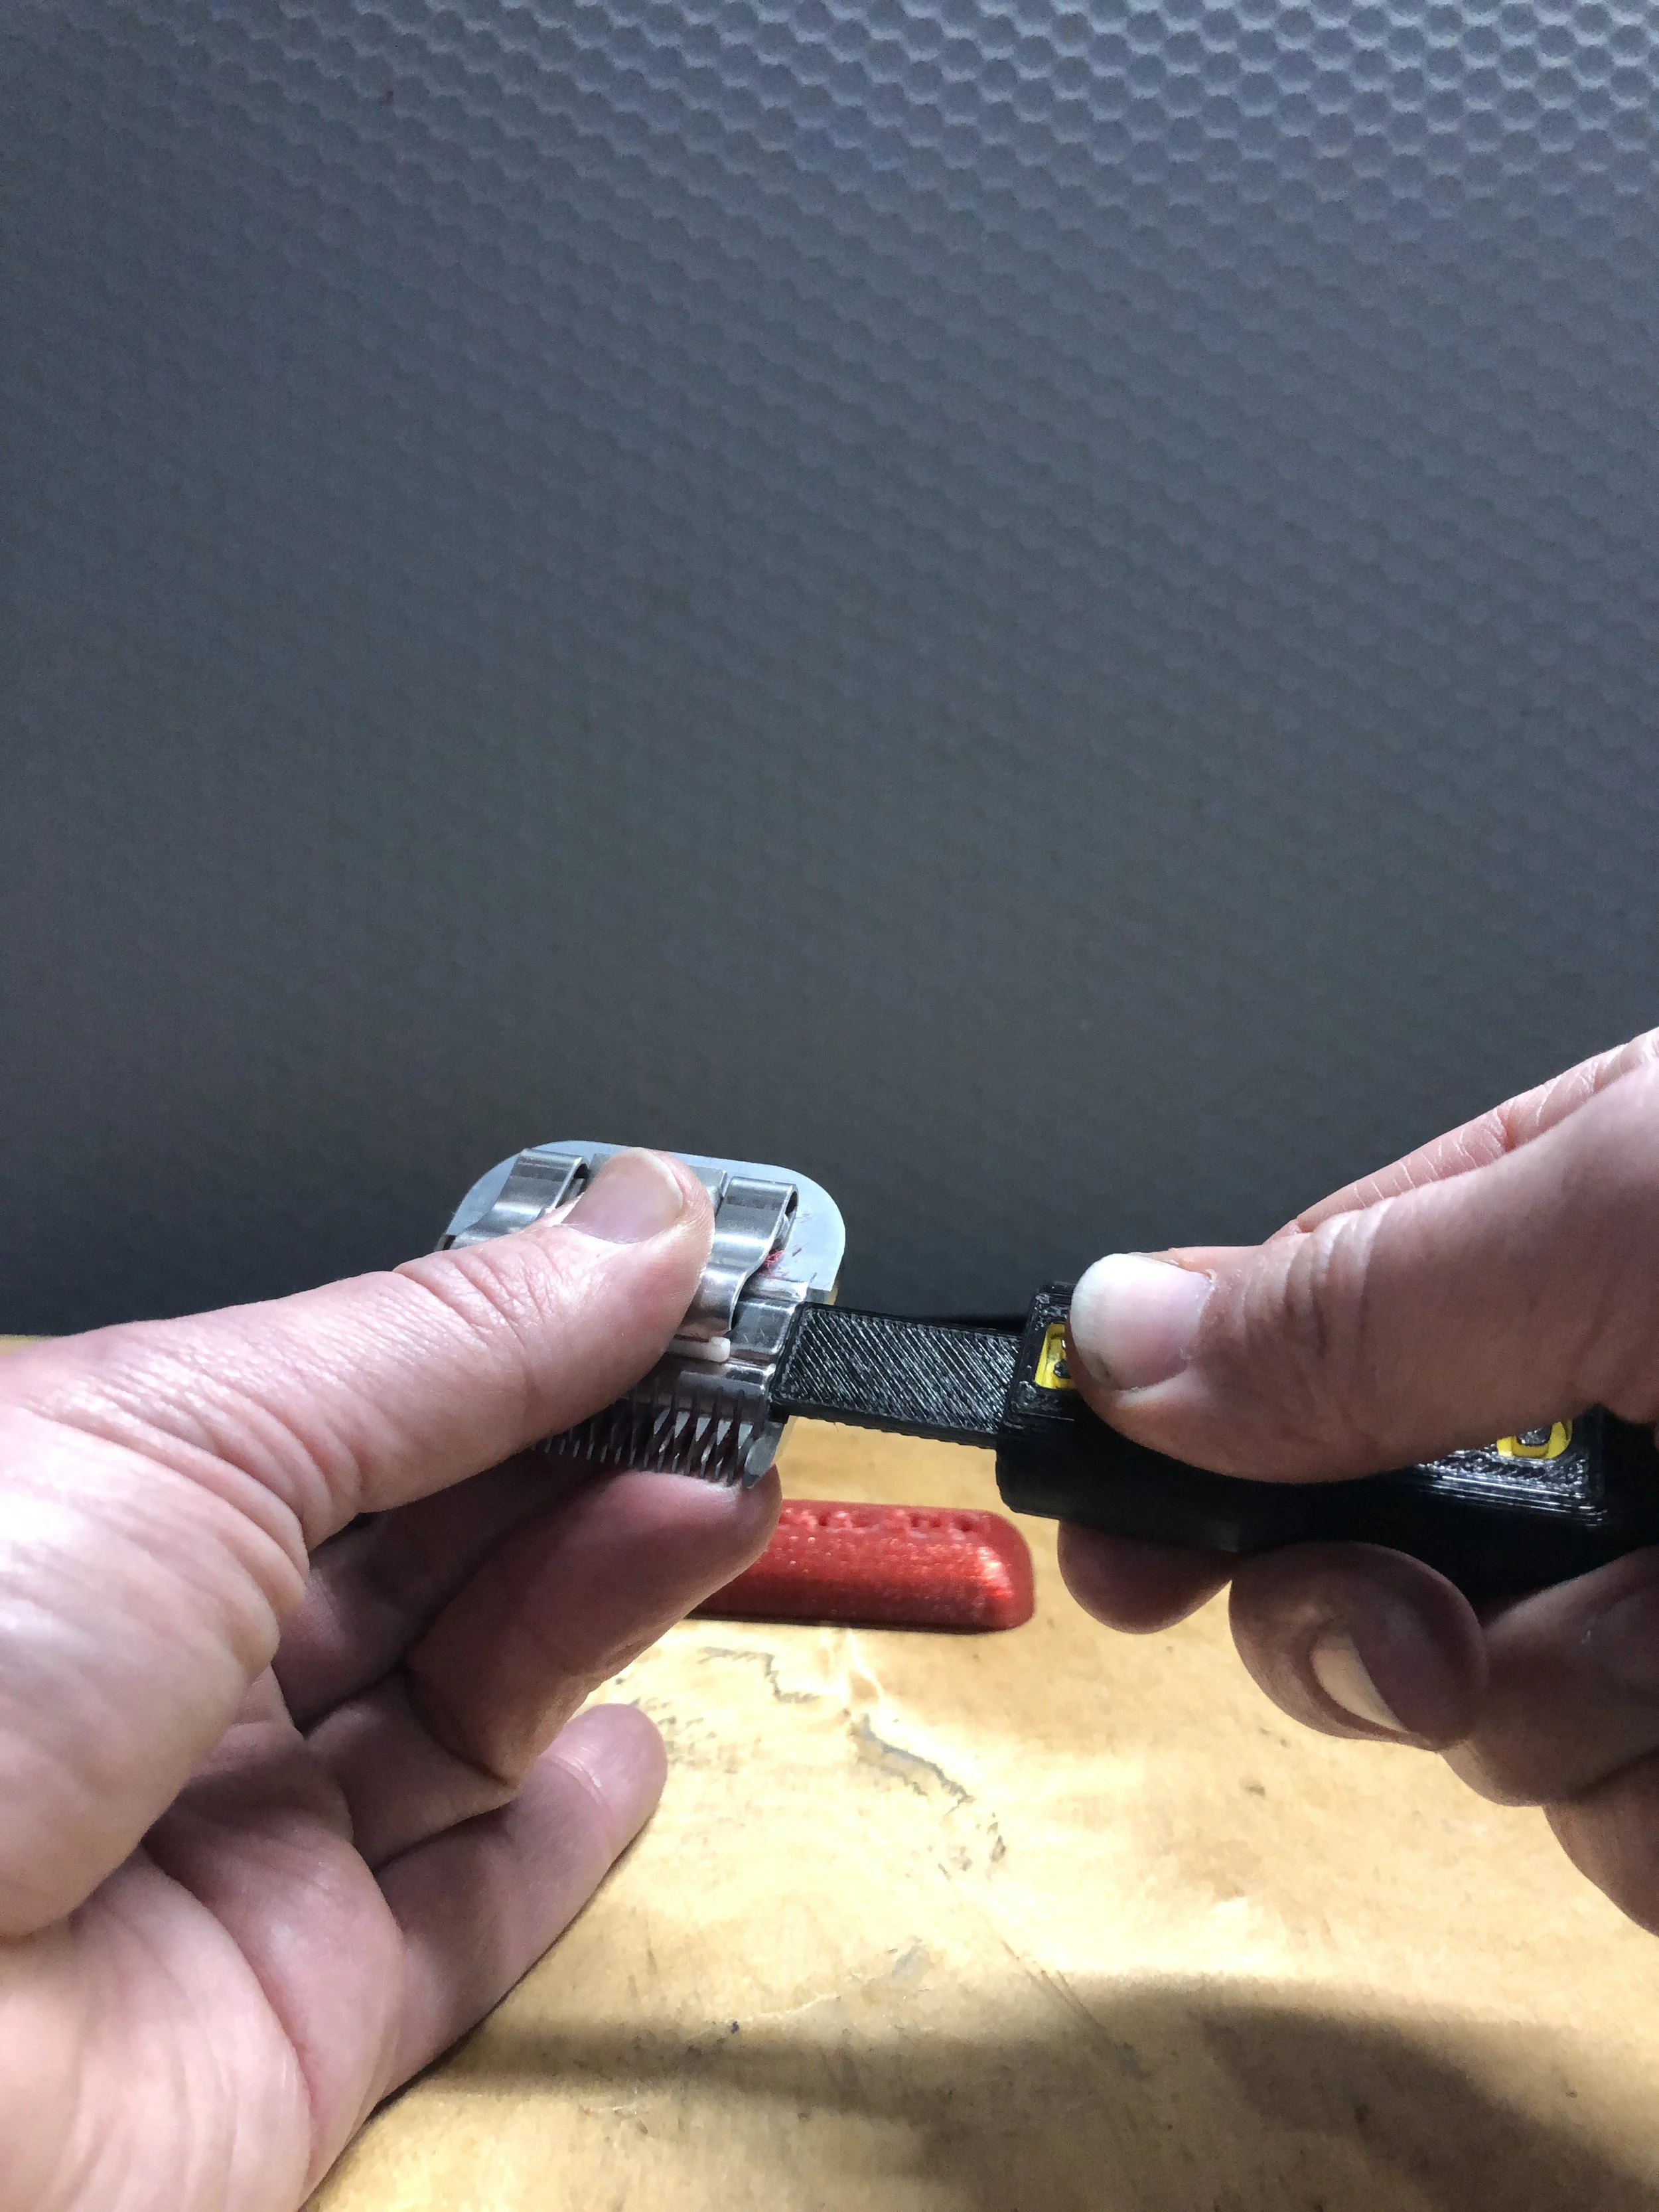
Using the back of the blade buddy push the cutter back into the blade
Now flip the blade around so the teeth are facing you and grip it on the socket.
Now the same as before line up the end of the blade buddy with the cutter

Same as before push the cutter across using the blade of the blade buddy
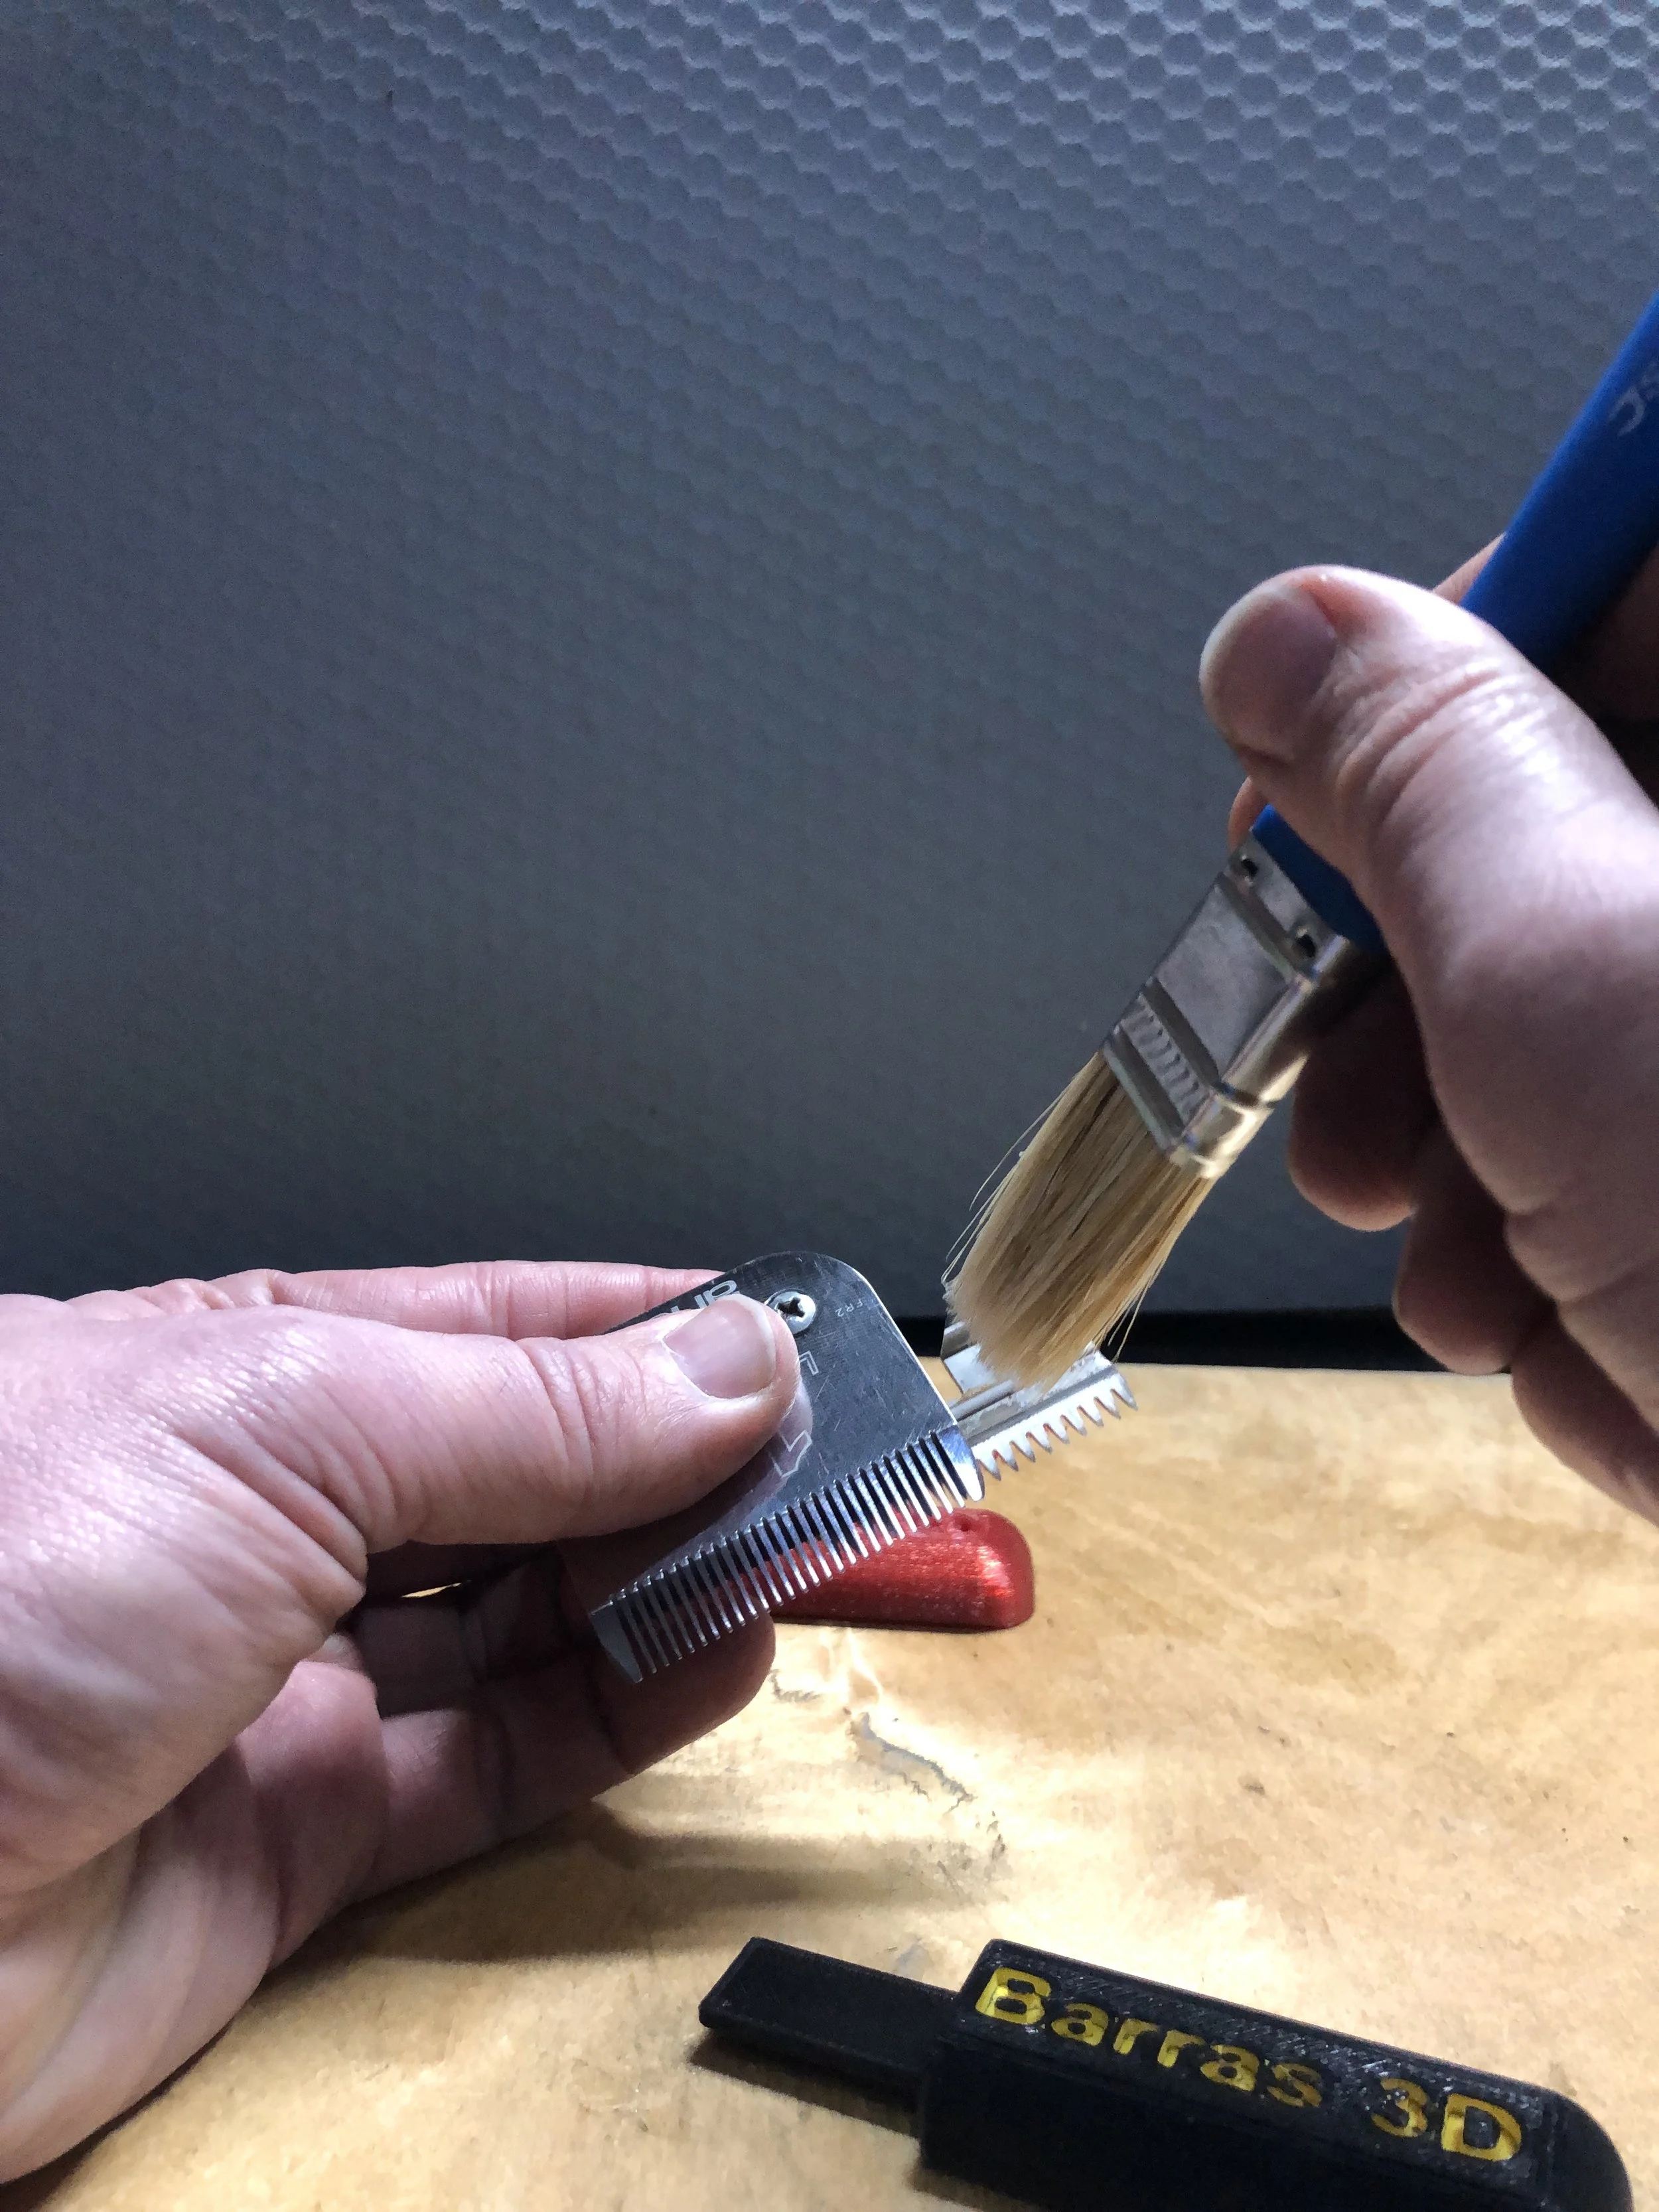
Same as before. use a paint brush or something to clean behind the cutter
And same as before use the back of the blade buddy to push the cutter back into the blade
The blade buddy can be used on wide blades but it isn’t perfect for them.
I am not going to make one just for wide blades as I know for a fact it would be used on a normal blade and this would lead to the cutter being push out the side of the blade. This is not a good outcome for myself or for anyone using it. So please don’t ask about a special for wide blades